Archive for October, 2009

Things metal box

Thursday, October 15th, 2009

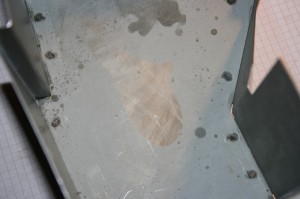
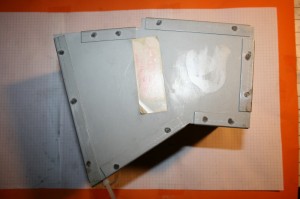
Picked up the metal box from the zinc plating works today. They certainly had tried to get it clean. The inside was virtually flawless (only a few spots) but the outside was still as it had been:

Inside Things metal box - almost flawless

Inside Things metal box - almost flawless

Outside of Things metal box - still some work needed here.

Outside of Things metal box - still some work needed here.

I’ve decided to keep this box instead of getting a new one (which had been my plan following the intial disaster). So I’ll have to carefully sand down the outside of the box to remove the spots before installing it into the pinball machine.

Touching up the touch ups

Thursday, October 8th, 2009

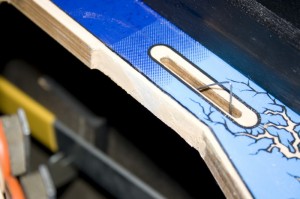
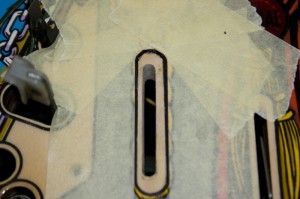
Having decided upon which protector to use for the electric chair (see last post) I inserted it into the playfield from the backside and was horrified to see the metal frame poking out from behind my front bevel. I had cut the bevel too deep! As I didn’t want to live with this (it was ugly), I decided to fill in the bevel with wood putty and rework it to the right level, so that it fitted with my new protector. I also discovered online that the original playfields also had bevels on the sides (which explains the shape of the artwork to the left of the hole. So I thought I would take this opportunity to bevel the hole as originally intended:

Electric Chair hole showing original bevel

Electric Chair hole showing original bevel

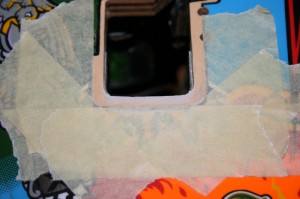
I also thought I’d take the opportunity to rework some of my earlier touch ups (note the use of masking tape to prevent damaging the playfield at the sanding phase):

Chair hole touch up

Chair hole touch up

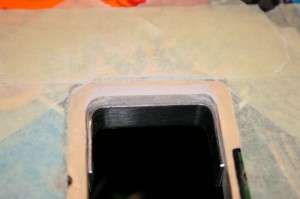
Chair hole from behind - (note the height of the protector in the hole)

Chair hole from behind - (note the height of the protector in the hole)

Rebuild of Swamp entrance from shooter lane

Rebuild of Swamp entrance from shooter lane

Some Wood splintered on the right inlane switch hole which needed rebuilding

Some wood splintered on the right inlane switch hole which needed rebuilding

Protecting the outhole under the electric chair

Thursday, October 8th, 2009

The hole under the electric chair gets a lot of use and abuse during normal play and is always the first hole to show wear and tear. With time this wear becomes extremely ugly. And with it (almost) being in the centre of the playfield, it’s not exactly something you can miss whilst playing:
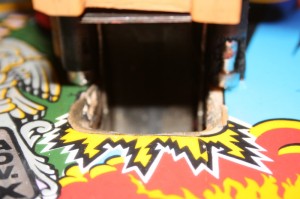
Typically damaged outhole under Uncle Fester's chair

Typically damaged outhole under Uncle Fester's chair

There are two alternative to protect this highly vulnerable area: firstly, a so called “Cliffy Protector”:
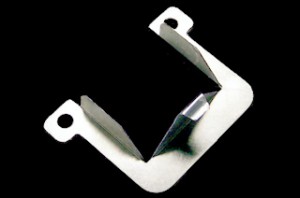
A Cliffy protector for the Electric Chair hole

A Cliffy protector for the Electric Chair hole

which clips onto the hole and is held in place by the screws for the chair bracket:
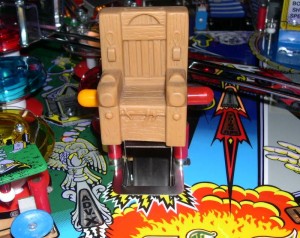
A Cliffy Protector mounted onto the playfield

A Cliffy Protector mounted onto the playfield

It certainly looks good! Of course the advantage of this is that it covers up the damaged hole as well as protecting it from further damage. The disadvantage is, well, that it isn’t original.

The second alternative protector looks like this:
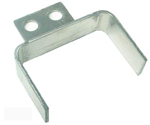
Hole Guard protector

Hole Guard protector

This part mounts from the underside of the playfield and protects the playfield when the balls are kicked out of the hole. This part can’t be seen when inserted into the machine and just does its job, leaving the playfield looking more authentic.

I chose to go with the second option (not only to have the playfield as authentic as possible, but also to show off my touch up!)  on the understanding that if the conditon of the hole degraded in any way in the future, then I could always install a Cliffy protector afterwards.
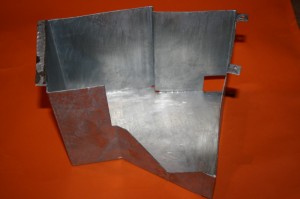
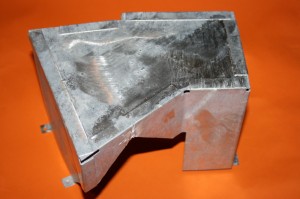
Thing’s Metal Box

Wednesday, October 7th, 2009

In my endeavours to get everything clean, I used some abrahsive cleaner to clean Thing’s Metal Box (which resides under the playfield). Unfortunately the cleaner that I used (Stahlfix) was way too agressive for the zinc coating and so etched through to the metal underneath:

Zinc plating etched away after cleaning

Zinc plating etched away after cleaning

More etching of the zinc coating

More etching of the zinc coating

Having made a few enquiries online as to what I could or should do, I decided to get the zinc coating renewed on the metal box. So I looked for a local works that could do this for me.

To cut as long story short, I went to pick it up today and was disgusted by the finish: the coating wasn’t uniform at all and there were like pieces of grit under the zinc coating making the finish extremely rough – both inside and out – just right for a pinball – NOT!

Needless to say I declined the part and asked them to rework it. I’ll see next week whether they’ve been able to correct the mistakes.

Incidentally – and this is a very important point, I had the metal box “hot-dip galvanised” when I should have had it galvanically galvanised (using electricity)  – this latter method results in a more uniform and better looking coating.

If I had only known that before (or the work shop had actually told me)!