At last, some progress…..
Today saw the completion of some of my playfield touch-ups.
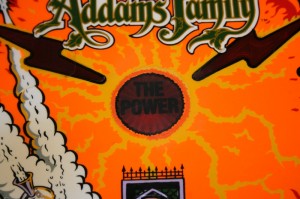
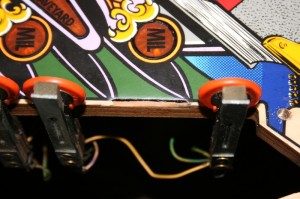
Firstly, The Power insert, which had sunk into playfield at the top causing ugly wear to the playfield above the insert, wearing down to the bear wood required the insert to be readjusted to the same height as the playfield. This was achieved by applying heat to the back of the insert using a hair-dryer, thereby warming it up and the surrounding adhesive, so that the insert could then be moved up flush with the playfield.
The bare wood was sealed with superglue and sanded down when dry so that the surface was flush with the playfield. This area was then touched up.
In order to get the bright orange colour, it was first necessary to apply an “undercoat” of acrylic white. Next came the outer yellow colour followed by the inner orange colour, which I had to mix myself, consisting of orange, yellow and white acrylic colours. Whereas the resulting orange colour wasn’t bad, applying it onto the previously “undercoated” white area meant that the top surface actually stood proud of the playfield slightly. Trying to sand this top surface down with 2000 grit sandpaper only succeeded in removing the orange and yellow colours. So in the end, I just had to leave the colour proud of the surface. In the accompanying photo, the apparent dark boarder above the yellow touch-up is caused by the shadow of the uneven layer. You can see how the insert looked before here.
Incidentally, as acrylic colours tend to darken on application of a clear overcoat (which I will be spot-applying to protect the touch up) it will be interesting to see how the colours turn out. Also, this overcoating may actually help with the unevenness.
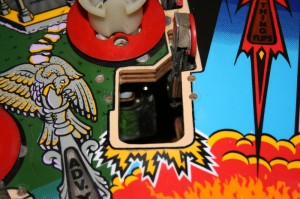
Next was the Electric Chair hole. Having sanded down the artificial wood to give the desired shape of hole and making sure that it was flush with the surface of the playfield I started off by touching up the white of the lightning bolts on both sides of the hole. Next came the green grass to the left of the hole, which was a combination of green and black acrylic colours and came out quite well. But then try as I might, I just couldn’t mix the light blue colour to the right of the hole.
I needed help. Fortunately for me, I had already been in contact with a pinball fan on Flippermarkt.de who has a reputation as an expert when it comes to touching up playfields and clearcoating. He supplies products to the automotive business and through his passion for pinball has colour “recipes” for the majority of colours for most of the popular pinball machines. This guy was able to help me at short notice and supplied me with the blue colour. At the same time (to save time in the future) I ordered yellow, lilac, ocre and wood colours from him also.
Incidentally, these colours are not water-based acrylics as I had been using for my touch-ups, but automotive paints. Fortunately though, I could thin these paints (and clean my brushes) with Isopropyl alcohol.
Having touched up the blue colour to the right of the chair, I painted the “wood” section with my newly acquired wood colour.
Once everything had dried it was time to do the black outline. For this, I used a permanent marker pen which came from a set used for marking CDs. In the set I bought was also an “eraser” to be used to remove any mistakes. This eraser proved to be a god-send as it allowed me to make minor corrections, whenever my straight lines ever went a bit wobbly. Interestingly, this eraser was also able to remove the newly-acquired automotive paints from the playfield surface thereby helping me with minor errors made when applying them also. You can see how the outhole looked before here.
The original damage to the Electric Chair hole actually started to break up the paintwork of the playfield underneath the Mylar protecting the outhole at the front of the hole. As touching up this area would require the Mylar to be removed, I decided to leave it as it was. It doesn’t look too bad as it is, but as it is going to be covered with a “Cliffy” hole protector anyway, it won’t be visible once I’ve finished.
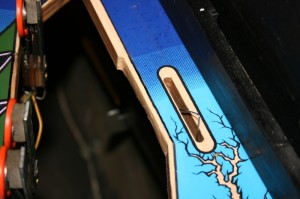
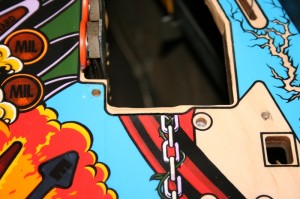
Next came the Swamp. Apart from the slightly damaged entrance from the shooter lane, the entrances and outholes of the Swamp were surprisingly in good condition. So having sanded down the artificial wood on the entrance to the Swamp from the shooter lane, I painted the artificial wood with wood colour and then repainted the black outline with my marker pen. The Swamp kickout only needed a little sanding down before reapplying the black outline and the left entrance to the Swamp just required the black outline to be reapplied.
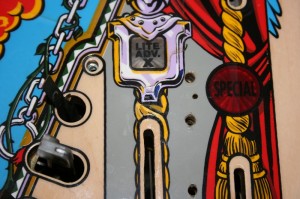
The right inlane was next, where the pinball drops from the wire ramp onto the playfield. This area had also been worn down to the bare wood. Once again my first task was to seal the wood with superglue. Having done this I used my automotive colours and marker pen to touch up the paintwork. In contrast to my touch up to The Power insert, I didn’t build up the damaged area to be flush with the playfield before touching up. As such, once complete, the damaged area was still indented into the playfield. My intention here is to build up this indentation to the level of the playfield with clearcoat. My reason for doing this is to give more protection to this area. You can see how this area looked before here.
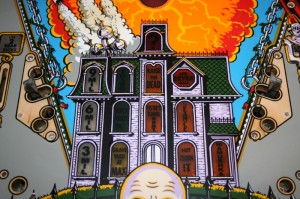
Finally I worked on the inserts. For this I turned the pinball machine on and let it go into attract mode – this way it was easier to see where paint was missing from the playfield inserts. The black borders were then easily touched up with the black marker pen. For the coloured areas, I found it easiest to black out the missing area with the black marker pen prior to applying the correct colour. This way I could guarantee an opaque finish. This was the strategy I also applied to the House, which, with its fine lines and details was the most challenging touch up by far!
