Update – another mistake
Now you may think that I’ve been up to nothing since my last post, but that’s not entirely true. In fact I made (yet another) mistake:
Even though I was so happy with how my playfield had come out, there were still indents around some of the inserts (for example the lightning bolts and the mansion inserts) where the clear just didn’t appear to take and/or had sunk. So, thinking I could repair these small indents, I used the “thin superglue” trick to fill out these indents and to sand them down flat with 2000 wet-and-dry sandpaper.
Unfortunately, in so doing, I managed to sand through my clearcoat on the mansion and on the right in- and outlanes. Even after polishing with Novus 2 and Finesse-It the clearcoat holes were still visible.
Now knowing that these holes would quickly deteriorate in play, I decided to repair these two areas of the playfield. Of course, I should have gone for a complete clearcoat of the whole playfield again, but decided not to, to save time and to not have the bother of the fumes in the house again.
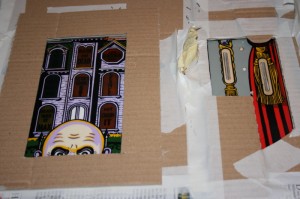
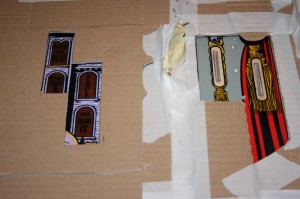
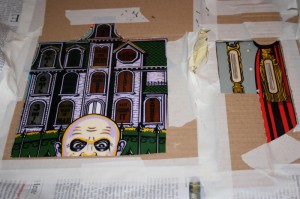
So for the mansion, I decide to build up the clearcoat in two separate layers and (hopefully) feathering the clearcoat edges of each so that the repair wouldn’t be too obvious (and hopefully flat). For the right in- and outlanes (which are more hidden from view) I only used a single feathered layer.

Second layer mask for clearcoat, elevated from playfield (by underlying mask) to create feathering effect

First layer mask for clearcoat, elevated from playfield (by underlying 2 masks) to create feathering effect
After two coats of the first layer and two coats of the second layer (with 5 minutes of breathing time in between) – both in a criss-cross pattern, I left the repair to dry.
After 24 hours of drying time, I noticed that once again, the insert edges (which I had originally tried to repair) were once again indented. This is soooooo frustrating!! This time however, I took my clearcoat, sprayed an amount directly into a plastic beaker and then used a brush to drip the lacquer into the indents. And then I waited……
After Easter (10 days later) it was time to sand down the new clearcoat. In order to prevent a repeat of the issue which caused this whole debacle, I used masking film to protect the untreated playfield, starting the film from half way in the outer “feathered” region of the repair. I then used 1200 grit wet-and-dry sandpaper to flatten the clearcoat. Once I was happy with that I removed the masking film and blended the edges into the playfield, first with 1200 and then with 2000 grit wet-and-dry paper.
For all of the sanding I used water with a little washing-up liquid in it (to help the paper to glide over the playfield) and hardly applied any pressure (as the water made the paper “stick” to the playfield thereby applying its own pressure – one of the benefits of capillary action).
Once I was satisfied with my results, I polished the area with Novus 2 and Finesse-It to bring out the shine in line with the rest of the playfield. Job done!
I did notice, however, that despite all my efforts there were still small pin-head indents around some of the inserts. This time, though, I’m going to leave them as they are.
Incidentally, I have recently bought some Carnauba Wax for the playfield. Even though a clearcoated playfield doesn’t normally need extra wax, this wax can (apparently) fill any imperfections in the surface, which might just help me with my pin-head indents….

