Archive for the ‘TAF’ Category

TAF Shooter Cover

Friday, May 15th, 2009

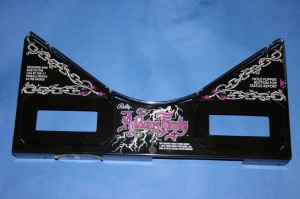
My recently acquired Shooter Cover from a Whirlwind Pinball doesn’t have the right dimensions. So I once again had a look around the internet and eventuall found the following through flippermarkt.de:

TAF Shooter Cover

TAF Shooter Cover

“Just what we’ve been searching for”. Of course I would have to redo the decal, but hey that shouldn’t be a problem…should it?

Matching colours

Thursday, May 14th, 2009

So I’ve got my graphic and I’m going to have my new plastics soon (having ordered them through pinball dreams). I just need to print the graphic out on a suitable medium and stick it onto the plastic. I have two options for the medium to use: either using tattoo foil or using a self adhesive foil – both on a transparent substrate. In both instances, I would then use an adhesive white backing to disperse the light.

According to the excellent tutorial at flippertreff.de an ideal medium for the white backing is Mactac 9800pro, which is available online. So I’ve got this. I’ve also got both tattoo foil (from Data Becker) and some A4 transparent adhesive foil from PaperMagic to try out. Now to the graphic.

The most important (and difficult) part of generating the graphic is matching the colours. Considering I’ve got five different versions of the Thing Flipper plastic – all with different colour variations – I’m guessing an exact match is not imperative. The only thing that is important, is that the left and right curtain plastics match and that the colour is close to that used for the curtain on the playfield (incidentally I never realised the graphic was part of a curtain until I started all this!).

For the colour matching I decided to print out some grids, like colour matching charts. As my printer (a Canon IP4300) uses CMYK colour mixing (as do all printers) to print images, I thought it would be easier to use a graphic programme which could easily manipulate and print out CMYK colours. So I turned to Photoshop to produce the grid.

I started off by producing a grid of 20 x 21 boxes (yes, I made a mistake – it should have been 21 x 21) . As I was trying to match the red, I chose Magenta and Yellow as the two main colours. Each column had increasing amounts of Magenta (from 5% to 100% in 5% steps) and each row had increasing amounts of yellow from 0% to 100% in 5% steps.
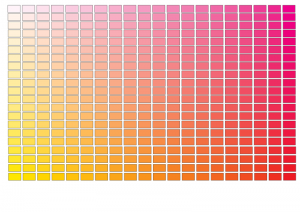
Magenta vs Cyan grid

Magenta vs Cyan grid

I printed this page out (letting the printer manage the colours). Unfortunately none of the reds matched the red of the plastic. So I produced 20 additional pages based on this grid, but with increasing values of Cyan on each page – each page with 5% more Cyan than the previous. I printed these out. From the resulting grids I found a near match to the red (C=20%, M=100%, Y=100%, K=0%). I was also able to match the other three colours:

dark red = C=55%, M=100%, Y=100%, K=0%
yellow = C=0%, M=15%, Y=100%, K=0%
dark yellow = C=45%, M=50%, Y=100%, K=0%

However, I was unhappy with the yellow and dark yellow and after a bit more experimenting and the printing of several mini-grids, finished off with colours of :

yellow = C=0%, M=14%, Y=100%, K=28%
dark yellow = C=43%, M=52%, Y=100%, K=9%

So now it was time to try out the print outs on both the tattoo medium and the sticky transparent foil. I started with the tattoo and boy was that difficult! Having printed it off, not only was the quality bad, but removing it from the backing was a struggle! I then tried to stick it onto white paper (to check the colours), but it was so sticky, flexible and stretchy, I just couldn’t get it to stick right:
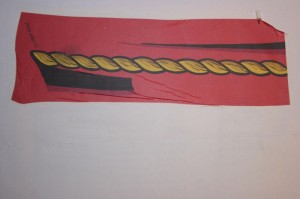
My first attempt at using tattoo foil - a disaster!

My first attempt at using tattoo foil - a disaster!

So moving onto the sticky transparent foil, I had more luck – although the colours changed quite a bit printing onto that medium – but I found that covering the image in a yellow filter with a 7% opaque value, restored the colours. So the red finished with a value of:  C=18%, M=93%, Y=100%, K=0%. I stuck this graphic onto a piece of Mactac 9800pro white backing just to see the result, and was suitably satisfied:
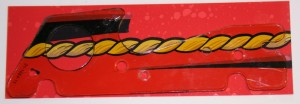
graphic on foil and white backing (with original plastic on top, for comparison)

graphic on foil and white backing (with original plastic on top, for comparison)

That’ll do!

Incidentally, producing the colour charts was a pain. So that you don’t have to go through that, you can download a zipped version of the photoshop file here. It’s 7 Mb (compressed) in size (85 Mb actual), so you need to want it!
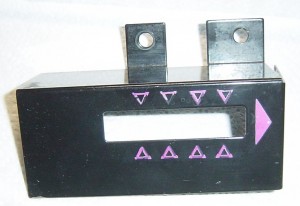
“Gold” plastics

Thursday, May 14th, 2009
"Golden" Plastics?

"Golden" Plastics?

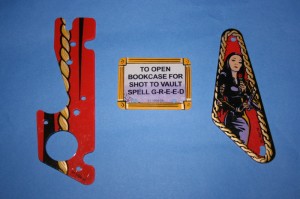
If you’ve been following this blog closely, you’ll have noticed, that I’ve acquired numerous NOS and used plastics. Whilst going through these today, I noticed three plastics which appeared different to the others.

The three plastics pictured above all have what appear to be gold highlights on the graphics instead of the normal light brown colour.

A quick posting on RGP for clarification yielded nothing though. I thought these plastics may have been for the TGA Gold run, but apparently they weren’t. Could they be prototype plastics?

Curtain graphic for Thing’s Flipper plastic

Sunday, May 10th, 2009

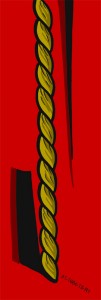
With the new plastic for Thing’s Flipper, which is larger than the original and where several holes have disappeared or moved, a new graphic had to be made based on the current one. This was achieved with Paint Shop Pro:

Curtain graphic

Curtain graphic

I took the opportunity to include the lowlights on the ropes, as with the playfield.

High Score!

Thursday, May 7th, 2009

I know I’ve set my game upfor 5 balls, so it’s a lot easier (in theory) but still it was a milestone for me to reach the high score and be able to put my initials in the pinball high scores list. How many points?

117,912,760

That’s how many!

New plastics

Monday, May 4th, 2009

What more plastics? No, not this time. As I mentioned in my post at the begining of April, I’m interested in replacing the plastic flasher caps in the machine which are rivetted on, with the screw-in cap flashers. Having already acquired the flasher bases for this job, it turns out that it isn’t a simple replacement. The hole required for the flasher cap and flasher bulb holder is slightly larger than the hole required for the riveted flasher assembly – although the holes for the rivets are almost in the same place.

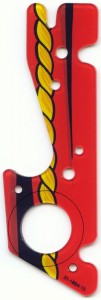
An example: Here is the top plastic for Thing’s Flipper showing the larger hole for the new flasher caps (using the same rivet holes):

Plastic for Thing's Flipper

Plastic for Thing's Flipper

Cutting a hole in the plastic the size of the new flasher cap would severely weaken the plastic and may even cause it to break. So the only option was to redesign the platic.

The redesign was made in CorelDRAW. From the above graphic, the outline was traced into a vector format and then a location found for the larger hole. Unfortunately the optimal location for the new hole, meant that the walls would still be thin, so that even this plastic version would be weak. So I decided to enlarge the plastic ever so slightly in both width and length:

Resized plastic

Plastic showing new size

The optimal location for the hole was now chosen to maximise  the wall thickness. Also the opportunity was taken to remove one of the holes, which served no purpose and also to move the backlighting lamp assembly to the bottom plastic. Moving the lamp to the bottom plastic would serve three purposes:

  1. To help with the mounting of the flasher unit
  2. To remove an unnecessary rivet from the top plastic
  3. To improve light distribution on the top plastic
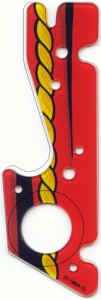
New top plastic for Thing's Flipper

New top plastic for Thing's Flipper

At the same time, the bottom plastic of the Thing Flipper plastic unit had to be changed. Not only was this done to match the new mounting holes with the top plastic and to relocate the backlighting bulb to the bottom, but also to cover the view into the opto sensor behind Thing’s flipper:

Lower plastic for Thing's Flipper

Lower plastic for Thing's Flipper

The Train Crash plastic and the Telephone plastic were much easier, as the external form for each was able to stay the same, just the best location for the larger hole had to be found.

Cleaning adhesive from an apron

Thursday, April 30th, 2009
The "new" apron following cleaning

The "new" apron following cleaning

Having got over the initial shock of my stupidity I made enquiries on RGP as to the best way of removing the rest of the adhesive from my apron. The answers were as varied as they were helpful and I finished off with the following recommendations:

  • Goo Gone
  • WD 40
  • Novus 2
  • Vegetable Oil
  • Lighter fuel
  • Petroleum Ether (cleaning solvent)

So I tried most of them.

At the end of the day, I managed to remove the adhesive, but I think it must have reacted with the silk screening below it, because when I removed the adhesive some of the colour from the silk screening was also removed. There were also patches where it was as if a top layer of silk screen had been removed leaving exposed “sticky” patches. Very strange.

If I were to ever do this again, I would address the cleaning in the following order (in order of aggressiveness):

  1. vegetable oil
  2. WD 40
  3. Novus 2
  4. Goo Gone
  5. Petroleum ether
Middle graphic of apron following cleaning

Middle graphic of apron following cleaning

Nooooooooooooooooooooooooo!

Tuesday, April 28th, 2009

I made a big mistake last night.

I was so happy to pick up my TAF apron yesterday. After all the searching, purchasing of alternative aprons, purchasing of paint, lacquer and decals, and having tried out a new decal application system (without success,) it was a relief to get an apron which I could just use. And the quality was excellent with all the screen printing almost intact.

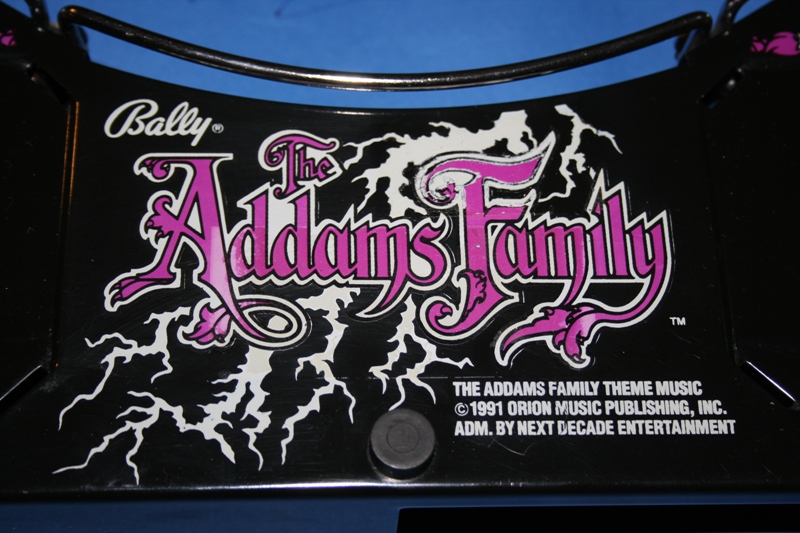
The only slight problem was there was a big patch of adhesive in the middle of the apron (over the Addams Family logo) left over from when a label had been removed and a more recent “warning high voltage” label. Of course I could have left these as they were, but the adhesive was now very dirty and the new label was a hideous yellow colour, so both had to be removed.

It was at this stage that I should have called for help and not rushed into it, but rush into it I did…

How not to clean an apron

I had some 80% rubbing alcohol (80% isopropyl + 20% water) and firstly tried it out on my old apron to make sure that the screen printing wasn’t affected by it. It wasn’t. So I turned to the new apron and very lightly tried to remove a small corner of adhesive. It worked! So now I was confident enough to work on the larger area of adhesive. So I gently started to rub away the adhesive and then noticed that some of the purple colour from the screen printing was being removed in the process. It was as if the alcohol was binding with the adhesive and then attacking the screen print underneath. Not good. So I left the rest in order to find out whether there was a better solution on RGP.

But then, for some strange reason unbeknown to me now, I tried to remove the yellow label. I started pulling it off and didn’t stop even when I saw it was taking off the screen print underneath. My instant reasoning was that the glue from the label had bonded with the screen print so that whatever I tried would not bring the necessary success. I also reasoned that however it was left, I would be able to touch up the screen print with acrylic paints at a later date.

So what I finished off with was a new apron with dirty adhesive, faded lettering where I had tried to remove the label adhesive and an area of screen printing physically removed, following removal of the second decal. How annoying!!

Questions about gameplay

Tuesday, April 21st, 2009

Despite the fact that I’m in the process of restoring my TAF, I’m still finding the opportunity to play it.

Two things have struck me as strange whilst playing, however: firstly I can’t seem to advance the THING lights on the backbox; secondly the top left flasher and train crash flasher (which are both connected to the same circuit) don’t appear to work during a game, but are fine during the flasher test routine.

So I asked on RGP what should make the THING lights advance and what should make the top left flashers flash.

Well it turns out that the THING lights advance every time the left ramp (red staircase) is is shot and the top left flashers flash every time the bear kick ramp (blue staircase) is shot.

As I haven’t managed to shoot the red staircase yet (the flipper seems weak) I verified the operation of the red staircase and the THING lamps by sending a ball up the ramp manually. It all worked perfectly. And then I noticed something strange:

The upper right flipper wasn’t fully retracted in its resting position when de-energised. In fact it was about 5 mm advanced at its resting position. Could this explain the reason why I wasn’t able to shoot the red staircase?

Lifting the playfield (having removed the balls!) I attempted to adjust the flipper (my first ever attempt). My first try wasn’t too successful (I didn’t tighten the flipper finger enough) meaning the flipper changed its position after a few flips. However having tightened it properly I was actually able to flip a ball up the red staircase – even during a normal game – but it was a really difficult shot (no wonder it’s worth 1 Million points!).

As far as the flashers are concerned, having identified what makes them flash, I established that they were in fact flashing, but very dimly.

I’ve asked the question on RGP and now have a few pointers on what to check for.

Found a TAF Apron – yippee!

Thursday, April 16th, 2009

It’s amazing what you find whilst surfing the internet: I was following a thread on RGP which was talking about ultimate modifications and was directed to this site – a widebody TAF modification. All I can say is WOW. It looks beautiful and shows what you can do if you have the time, money and necessary tools. Fantastic.

However even more interesting was the fact that the hobbyist concerned was offering the original parts (including plastics and apron) for sale. A quick email confirmed that the parts were still available, so I bought them.

So I now have an official TAF Apron which I can use to replace my existing one. Who knows, the condition may be so good, that I don’t need to restore it (although this would be disappointing at this stage, as I’ve invested a lot of time and money in the materials necessary to reproduce the TAF apron – not to mention the two additional aprons!).