Applying the decals
Monday, May 21st, 2012I really wasn’t looking forward to applying the decals to the backbox and cabinet. But as always I tried to prepare for the task by asking lots of pinheads for advise and watching numerous YouTube videos prior to starting. Following all of this research, one thing made me really nervous and that was the cutting of the decals having applied them and ensuring straight, uniform edges.
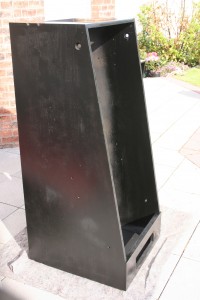
So I started with the backbox. Now I had intended to apply the decals on one side dry and one side “wet” as there are (as always) differing opinions as to which way is best and I wanted to experiment. To prepare for the wet application, I had bought some Rapid-Tac which sounded an ideal solution (pun intended). Having cleaned the first surface with Rapid-Tac, I applied the first side dry.
Applying the first side dry went so well, however, I skipped doing the second side wet and applied it dry also. I was happy.
Using a straight edge to cut the sides was more of a challenge – as anticipated – and although the results weren’t perfect, I was also happy with the results.
But then came the cabinet (which Stephan had helped me carry back down to the cellar)…
Being a decal application professional after my vast experience of two backbox sides, I thought applying the cabinet decals was going to be a doddle. How wrong could I be….
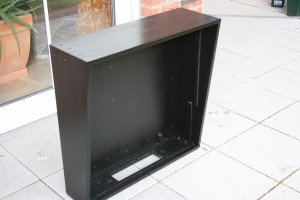
I started with the front decal. Just after starting to apply the decal (and no I didn’t use a blanking plate for the large cut out), I noticed that an air bubble had formed. So I pulled back the decal to expose the air bubble in order to flatten the decal. Unfortunatelay in pulling the decal back, some of the paint was pulled up with the decal and it turns out that on reapplication of the decal, the paint that was removed and on the back of the decal didn’t fall exactly into the surface, where it had been removed from. This meant that having flattened out the air bubble I had left an even more uneven surface than if I had left it alone – arghhhh! And I didn’t learn from my mistake either, as I repeated this mistake three times in total for the front decal alone!
And then, to make matters worse, in cutting out the holes in the decals, I used a scapel and actually managed to cut away some wood from the hole around the start button. How annoying!
Trimming the edges wasn’t as bad as with the head, however, as I had learned that it is possible to do a first cut and then correct any mistakes with a second or even third pass, thereby resulting in an acceptable edge.
By the time I got to the main cabinet decals I was disheartened. After my experience with the front decal I wanted to apply them wet, but couldn’t as I had exposed wood, so I had to apply them dry. This was difficult and each side took me one and a half hours to complete. As I was applying the decals I also had air bubbles. This time, I tried to catch them quickly to get rid of them, without pulling the decal back too far. Any that I had missed I pricked with my scapel and tried to squeeze the air out.
The end result wasn’t perfect – especially considering the amount of time I had invested in total in getting the cabinet finished, but I had got it done and learned a lot on the process.

