Archive for April, 2009

Cleaning adhesive from an apron

Thursday, April 30th, 2009
The "new" apron following cleaning

The "new" apron following cleaning

Having got over the initial shock of my stupidity I made enquiries on RGP as to the best way of removing the rest of the adhesive from my apron. The answers were as varied as they were helpful and I finished off with the following recommendations:

  • Goo Gone
  • WD 40
  • Novus 2
  • Vegetable Oil
  • Lighter fuel
  • Petroleum Ether (cleaning solvent)

So I tried most of them.

At the end of the day, I managed to remove the adhesive, but I think it must have reacted with the silk screening below it, because when I removed the adhesive some of the colour from the silk screening was also removed. There were also patches where it was as if a top layer of silk screen had been removed leaving exposed “sticky” patches. Very strange.

If I were to ever do this again, I would address the cleaning in the following order (in order of aggressiveness):

  1. vegetable oil
  2. WD 40
  3. Novus 2
  4. Goo Gone
  5. Petroleum ether
Middle graphic of apron following cleaning

Middle graphic of apron following cleaning

Nooooooooooooooooooooooooo!

Tuesday, April 28th, 2009

I made a big mistake last night.

I was so happy to pick up my TAF apron yesterday. After all the searching, purchasing of alternative aprons, purchasing of paint, lacquer and decals, and having tried out a new decal application system (without success,) it was a relief to get an apron which I could just use. And the quality was excellent with all the screen printing almost intact.

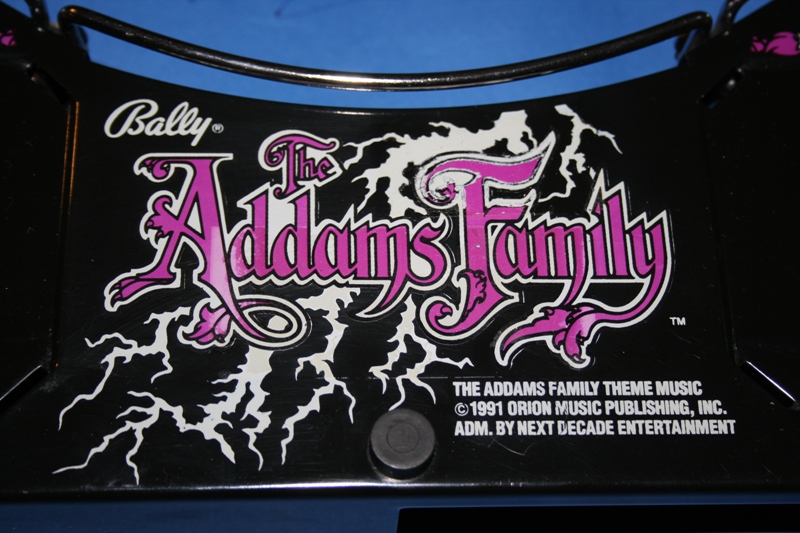
The only slight problem was there was a big patch of adhesive in the middle of the apron (over the Addams Family logo) left over from when a label had been removed and a more recent “warning high voltage” label. Of course I could have left these as they were, but the adhesive was now very dirty and the new label was a hideous yellow colour, so both had to be removed.

It was at this stage that I should have called for help and not rushed into it, but rush into it I did…

How not to clean an apron

I had some 80% rubbing alcohol (80% isopropyl + 20% water) and firstly tried it out on my old apron to make sure that the screen printing wasn’t affected by it. It wasn’t. So I turned to the new apron and very lightly tried to remove a small corner of adhesive. It worked! So now I was confident enough to work on the larger area of adhesive. So I gently started to rub away the adhesive and then noticed that some of the purple colour from the screen printing was being removed in the process. It was as if the alcohol was binding with the adhesive and then attacking the screen print underneath. Not good. So I left the rest in order to find out whether there was a better solution on RGP.

But then, for some strange reason unbeknown to me now, I tried to remove the yellow label. I started pulling it off and didn’t stop even when I saw it was taking off the screen print underneath. My instant reasoning was that the glue from the label had bonded with the screen print so that whatever I tried would not bring the necessary success. I also reasoned that however it was left, I would be able to touch up the screen print with acrylic paints at a later date.

So what I finished off with was a new apron with dirty adhesive, faded lettering where I had tried to remove the label adhesive and an area of screen printing physically removed, following removal of the second decal. How annoying!!
Questions about gameplay

Tuesday, April 21st, 2009

Despite the fact that I’m in the process of restoring my TAF, I’m still finding the opportunity to play it.

Two things have struck me as strange whilst playing, however: firstly I can’t seem to advance the THING lights on the backbox; secondly the top left flasher and train crash flasher (which are both connected to the same circuit) don’t appear to work during a game, but are fine during the flasher test routine.

So I asked on RGP what should make the THING lights advance and what should make the top left flashers flash.

Well it turns out that the THING lights advance every time the left ramp (red staircase) is is shot and the top left flashers flash every time the bear kick ramp (blue staircase) is shot.

As I haven’t managed to shoot the red staircase yet (the flipper seems weak) I verified the operation of the red staircase and the THING lamps by sending a ball up the ramp manually. It all worked perfectly. And then I noticed something strange:

The upper right flipper wasn’t fully retracted in its resting position when de-energised. In fact it was about 5 mm advanced at its resting position. Could this explain the reason why I wasn’t able to shoot the red staircase?

Lifting the playfield (having removed the balls!) I attempted to adjust the flipper (my first ever attempt). My first try wasn’t too successful (I didn’t tighten the flipper finger enough) meaning the flipper changed its position after a few flips. However having tightened it properly I was actually able to flip a ball up the red staircase – even during a normal game – but it was a really difficult shot (no wonder it’s worth 1 Million points!).

As far as the flashers are concerned, having identified what makes them flash, I established that they were in fact flashing, but very dimly.

I’ve asked the question on RGP and now have a few pointers on what to check for.

Found a TAF Apron – yippee!

Thursday, April 16th, 2009

It’s amazing what you find whilst surfing the internet: I was following a thread on RGP which was talking about ultimate modifications and was directed to this site – a widebody TAF modification. All I can say is WOW. It looks beautiful and shows what you can do if you have the time, money and necessary tools. Fantastic.

However even more interesting was the fact that the hobbyist concerned was offering the original parts (including plastics and apron) for sale. A quick email confirmed that the parts were still available, so I bought them.

So I now have an official TAF Apron which I can use to replace my existing one. Who knows, the condition may be so good, that I don’t need to restore it (although this would be disappointing at this stage, as I’ve invested a lot of time and money in the materials necessary to reproduce the TAF apron – not to mention the two additional aprons!).

TAF Shooter cover

Wednesday, April 15th, 2009
Whirlwind Shooter Cover

Whirlwind Shooter Cover

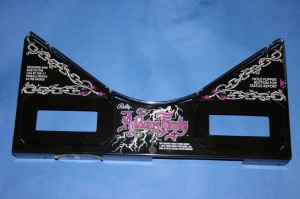
I’ve been so involved in sourcing an apron for my TAF that I had completely forgotten the shooter cover (the part to the right of the apron, covering the shooter/plunger and with a window through which the shooter tip is visible). If I were to “produce” a new apron I definitely would want to produce a matching shooter cover.

A quick look on the internet revealed nothing, so I headed over to RGP and made an enquiry. Sure enough within a very short space of time I received a positive response and so purchased a Whirlwind shooter cover.

Decals for my Apron

Tuesday, April 14th, 2009

Well I now have two aprons which, in order to convert to a proper TAF apron, require me to paint, apply decals and finally apply a clear coating.

The only problem is I don’t like the standard decals that are available for the TAF apron and which you can easily buy on the internet, as they’re too thick. What I’m after is something more similar to the original – a transfer decal.

Things are never easy though and with the TAF apron the requirement is for a white decal on a black background, so printing on a transparent transfer foil (like a tattoo foil) isn’t an option as printers (both inkjet and laser) can’t print white ink. An option could be printing onto white transfer paper, but once again this isn’t ideal, as the decal would need to be carefully cut out and may leave a white border at the edges.

To look for an alternative, I’ve already trawled the internet and found the potentially ideal solution: PulsarProFx sell a dry transfer kit (DecalProFx) which can produce very thin decals – even in white – using nothing more than a laser printer and special transfer paper. The process is complex but the results look good.

I purchased a DecalProFx kit a while back and have tried over the last few moths to produce the decals for the TAF apron. However to date I haven’t succeeded, unfortunately, even with the help of the manufacturer. I will continue to persevere with this, but am beginning to lose confidence in this method as a viable solution.

Hurricane Apron

Tuesday, April 14th, 2009

I finally received my Hurrican Apron today and can confirm that, like my recently acquired Whitewater Apron, it is a direct replacement for the TAF Apron (but doesn’t have the star post and has a complete wire frame).

I just need to paint it, apply new decals and apply a finish to it now….

Homemade Plastics

Thursday, April 9th, 2009

Surfing on flippermarkt.de (my favourite forum) last night, I discovered that it could be possible to make some repro plastics for my TAF.  “But why?” I hear you cry; why should I want to do that? Yes, despite the fact that I’ve nearly got two complete sets of plastics in addition to the one on the pinball machine, there is something I would like to change, as far as the plastics are concerned:

Despite the fact that I want to keep my pinball as true to an original TAF as possible, one thing has really bugged me in the short time I’ve had it, namely replacing the flasher bulbs under the “permanent” flashers. These are the ones with the plastic flasher cover riveted to the plastic directly, meaning that to change the flasher bulb means removing the plastics. There are three candidates here: the flasher next to Thing’s flipper, the flasher behind the telephone and the flasher behind the train wreck target. Despite the fact that I’ve already changed the last two (which also happen to be the most difficult to change) so that they probably wont burn out again in my life-time (they’ll burn out tomorrow now that I’ve written that) I really would like to change these flashers to the ones with the removable caps (as on the ramps, for example). This would give me a couple of advantages, firstly, I could easily change a broken bulb, and secondly I could try out different coloured bulb and cap combinations easily, to see which I like best. However, there’s a problem…

Replacing the Flasher Covers

It turns out that the footprint of the screw in flasher cap (ie the hole required for the bulb holder which allows the flasher cap to be inserted) is almost 15mm larger (in diameter) than the hole for the “permanent” variant, meaning that to substitute the screw in version would require making the bulb socket hole significantly larger (the rivet holes are almost the same distance apart). Whereas this wouldn’t be a problem for the flasher behind the train wreck target, the phone flasher seems like it would be too close to the ‘phone plastic. And the hole for the flasher next to Thing’s flipper would in fact be too big for the location on the plastic, where it currently is.

Therefore in order to replace the flasher caps with the screw in variants will require me to relocate the flasher holes. Hence the need for some homemade plastics.

Watch this space…

Non reflecting pinball glass

Thursday, April 9th, 2009

Since receiving my pinball I’ve been working on it and playing it with the glass removed. In fact I’m not expecting to replace the glass until I’ve completed my renovation.

Reading through RGP and several forums, however, it would appear that light reflection from the pinball glass can cause problems and detracts from the gameplay. Apparently reflection of the DMD is a significant problem and some people even produce glare guards in order to prevent such reflections.

So it was interesting to find on flippermarkt.de a pinball fan selling specially treated pinball glass which reduces the reflections dramatically.

This I have to try….

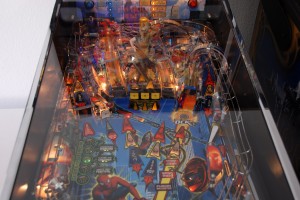
Spiderman with normal glass

Spiderman with normal glass

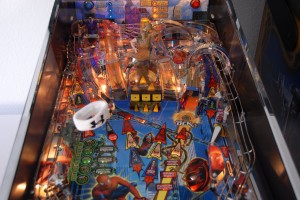
Spiderman with specially treated glass

Spiderman with specially treated glass

Unfair gameplay?

Monday, April 6th, 2009

Despite not having Thing’s hand attached, the pinball continues to play well (the pinball automatically adjusts itself to play with a broken – or in my case missing – hand). So I had a few games last night. However I discovered an interesting phenomenon:

As I was getting to the required 3 Train Wrecks and 13 Bear Kicks to light the Extra Ball, all of a sudden the flippers appeared to weaken making the shots more difficult to achieve. Needless to say, I didn’t achieve them.

So what was this? Added intelligence preventing me form reaching my goals?

So I opened a thread on RGP and flippermarkt.de (my favourite stop off points for such questions) and it wasn’t too long before it was clarified to me that if you use the flippers a lot, they tend to warm-up and thereby get weaker.

So that’s another fact I’m going to have to take into account on my way to becoming a pinball wizard!