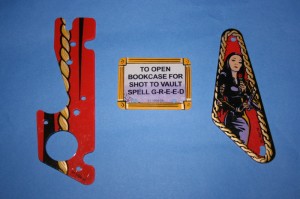
So I’ve got my graphic and I’m going to have my new plastics soon (having ordered them through pinball dreams). I just need to print the graphic out on a suitable medium and stick it onto the plastic. I have two options for the medium to use: either using tattoo foil or using a self adhesive foil – both on a transparent substrate. In both instances, I would then use an adhesive white backing to disperse the light.
According to the excellent tutorial at flippertreff.de an ideal medium for the white backing is Mactac 9800pro, which is available online. So I’ve got this. I’ve also got both tattoo foil (from Data Becker) and some A4 transparent adhesive foil from PaperMagic to try out. Now to the graphic.
The most important (and difficult) part of generating the graphic is matching the colours. Considering I’ve got five different versions of the Thing Flipper plastic – all with different colour variations – I’m guessing an exact match is not imperative. The only thing that is important, is that the left and right curtain plastics match and that the colour is close to that used for the curtain on the playfield (incidentally I never realised the graphic was part of a curtain until I started all this!).
For the colour matching I decided to print out some grids, like colour matching charts. As my printer (a Canon IP4300) uses CMYK colour mixing (as do all printers) to print images, I thought it would be easier to use a graphic programme which could easily manipulate and print out CMYK colours. So I turned to Photoshop to produce the grid.
I started off by producing a grid of 20 x 21 boxes (yes, I made a mistake – it should have been 21 x 21) . As I was trying to match the red, I chose Magenta and Yellow as the two main colours. Each column had increasing amounts of Magenta (from 5% to 100% in 5% steps) and each row had increasing amounts of yellow from 0% to 100% in 5% steps.
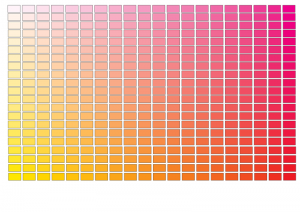
Magenta vs Cyan grid
I printed this page out (letting the printer manage the colours). Unfortunately none of the reds matched the red of the plastic. So I produced 20 additional pages based on this grid, but with increasing values of Cyan on each page – each page with 5% more Cyan than the previous. I printed these out. From the resulting grids I found a near match to the red (C=20%, M=100%, Y=100%, K=0%). I was also able to match the other three colours:
dark red = C=55%, M=100%, Y=100%, K=0%
yellow = C=0%, M=15%, Y=100%, K=0%
dark yellow = C=45%, M=50%, Y=100%, K=0%
However, I was unhappy with the yellow and dark yellow and after a bit more experimenting and the printing of several mini-grids, finished off with colours of :
yellow = C=0%, M=14%, Y=100%, K=28%
dark yellow = C=43%, M=52%, Y=100%, K=9%
So now it was time to try out the print outs on both the tattoo medium and the sticky transparent foil. I started with the tattoo and boy was that difficult! Having printed it off, not only was the quality bad, but removing it from the backing was a struggle! I then tried to stick it onto white paper (to check the colours), but it was so sticky, flexible and stretchy, I just couldn’t get it to stick right:
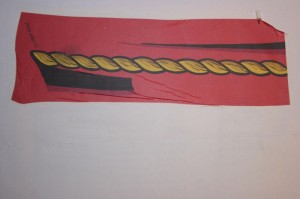
My first attempt at using tattoo foil - a disaster!
So moving onto the sticky transparent foil, I had more luck – although the colours changed quite a bit printing onto that medium – but I found that covering the image in a yellow filter with a 7% opaque value, restored the colours. So the red finished with a value of: C=18%, M=93%, Y=100%, K=0%. I stuck this graphic onto a piece of Mactac 9800pro white backing just to see the result, and was suitably satisfied:
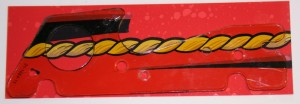
graphic on foil and white backing (with original plastic on top, for comparison)
That’ll do!
Incidentally, producing the colour charts was a pain. So that you don’t have to go through that, you can download a zipped version of the photoshop file here. It’s 7 Mb (compressed) in size (85 Mb actual), so you need to want it!
