Archive for April, 2010

Power Connectors

Friday, April 30th, 2010

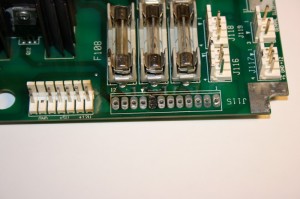
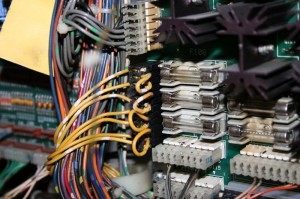
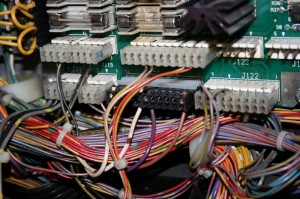
I’ve recently been getting machine resets on the TAF whenever I’ve switched it on. Not knowing why this should be occuring (there’s not a lot attached to the machine currently) I decided to take the opportunity to replace the power plugs and pin connectors on the power board.

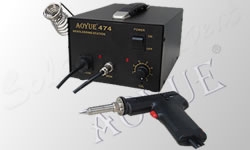
In order to accomplish this, I used my newly acquired Aoyue 474A+ desoldering station, which has recently been recommended in several gaming forums as being easy to use and very cost effective.

Aoyue 474A+ desoldering station

It turns out to be very easy to use and gives good results:

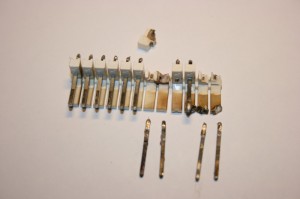
J115 pins remove from board

What was left of J115 pin connector

Having replaced the pin connector on the board it was time to replace the plugs:

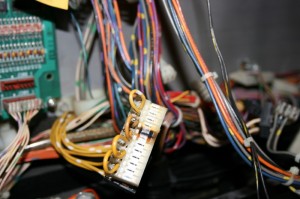
Old J115 plug connector showing overheating

Despite the numerous recommendation on the pinball newsgroup and forums to use Molex plugs with tri-furcon connectors, the company Pancon produces a range of IDC connectors which are similar to the originals but which can withstand a higher working temperature (the MAS CON range). Ideal for the power connectors on the power board.

I managed to find a local source of these and purchased them. Unfortunately, my local supplier only had 6 pin versions available, so in order to replace the 12 pin J115 two such plugs were needed.

Pancon Mas-con plugs for J115

At the same time I replaced the connector plug for the GI circuits (J121) which, being 11 pin required one of the 6 pin plugs to be cut to 5 pin.

Pancon Mas-con plugs for J121

Rollover Switches – Part 2

Tuesday, April 20th, 2010

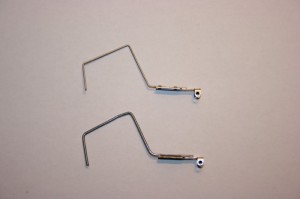
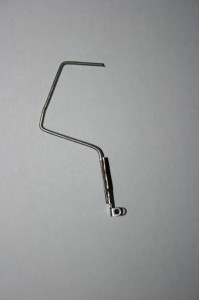
Even though I had already repaired the broken wire on my rollover switch (see earlier post below) I received a new original switch wire today from a kind flippermarkt.de forum member. I promptly replaced my home-made wire with this original.

Original switch wire with my home-made version (below)

Signed translite

Monday, April 19th, 2010

It might have taken 41 days round trip, but I got my translite back today.

I had sent it off to America to be signed by the designer of the TAF pinball, Pat Lawlor.

Of course, this was no simple feat, as to get it done in a way that Pat could work with, required me to use the kind services of a very helpful gentlemen in the US, who had in fact helped me previously with my LED lamps.

Thanks a million Jay. You’re a hero!

My translite with Pat Lawlor's signature

The bookcase base

Sunday, April 18th, 2010

It’s always struck me as funny, why the bookcase and bookcase base are blue. The blue just doesn’t suit the game in my opinion – especially the base.

There are of course, decals which you can buy to stick onto the base to blend in with the playfield. But based on my experience, the colours are all wrong and/or the size of the decal is wrong.

Typical example of a decal attached to the bookcase base

So I decided to paint my new bookcase base.

As I have a scan of a bookcase decal, I used it to separate the three colours (grey, yellow and black) in Photoshop, create some masks with my CraftRobo plotter and paint the base using these masks and my airbrush.

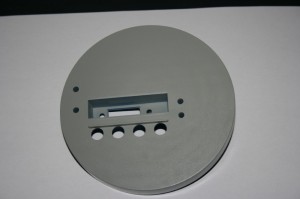
Prior to spraying the base, I sanded it down with 1200 grit wet and dry sandpaper. I then spray-painted the grey colour and left it to dry.

Bookcase base painted grey

In Photoshop it was quite easy to separate the colours. Having got the yellow and black shapes separated, I increased their size by four pixels in order to help me prevent having grey streaks between the black and yellow shapes (which could always happen if the masks weren’t aligned properly).

Before cutting the yellow mask, I decided to simplify the masking process by joining up as many of the yellow “islands” as possible, making sure I joined these islands underneath where the black paint would be applied. Without this, or so I thought, applying the mask would be very difficult. I then cut the mask.

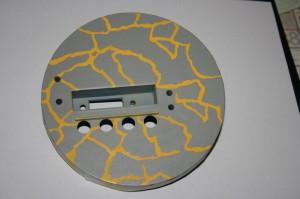
Using the raised ridge on the bookcase base as a guide, I placed the yellow mask onto the base. This wasn’t as easy as I had thought, as the fact that I had joined up all of the “islands” actually made the process even harder! However, I perservered and using a ruler I managed to get the mask applied to the base.  Spray time!

Yellow lines applied to base

Finally, I repeated this procedure with the black mask. This was, however the most difficult as the mask was made up itself of little masking islands, which are very difficult to apply. No wonder no-one else does this on their bookcase base!

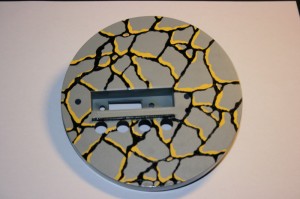
Having applied the black mask, I noticed that the alignment with the yellow wasn’t perfect, so I made a few manual adjustments to the mask before spraying the black paint.

Finished bookcase base

I now just need to apply a clear coat to this and then I’m done!

Rollover switches

Friday, April 16th, 2010

I intend to attach as much stuff under the playfield first, as I don’t like the thought of all of those bits and pieces dangling under the playfield, potentially shorting something somewhere. So today I reattached all of the rollover switches.

Unfortunately the shooter lane switch was broken. Actually, it was the metal wire which was broken. So it was time to either get a new switch or repair the existing one.

Well it so happens, that I had already bought some stiff wire exactly for such a repair, but now that it came to using it, I noticed that the replacement wire is actually thicker than that of the existing switches. Nevertheless, I decided to attempt a repair – even with this thicker wire.

Now the formed wire is attached to a blade which is then attached to the switch housing. In order to replace the wire therefore requires the broken wire to be removed from the blade. The blade has two arches formed in it through which the wire passes and secured (quite possibly using heat treatment). Then the wire is spot welded to the blade – a very secure and stable set-up. Unfortunately replacing the wire therefore is nigh on impossible!

Original rollover switch wire attached to switch blade

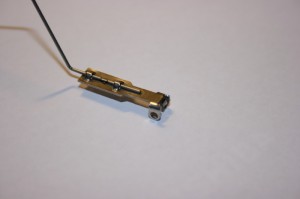
So, with a Dremel (equivalent) I cut along the length of the wire at both arch supports and at the spot weld until the wire broke free. I had to be very careful here, so as to not damage the blade. I then formed the new wire to the right shape and was able to use the cut arches (which now had a “U” shape) to position the wire. Using superglue, I stuck the wire to the blade and once dry, used an epoxy glue to secure the wire in position.

Repaired wire and blade

There are two pivot points moulded onto the switch cover. For the shooter lane switch, the one furthest from the edge should be used. Having mounted the blade/wire onto the switch body, I reassembled the switch onto the playfield.

Shooter Lane switch repaired

Rebuild start – Targets

Thursday, April 15th, 2010

I started with the rebuild today and first-up were the targets.

I first removed the old foam from between the target and its metal support with a sharp knife, making sure that I removed all of the old adhesive also, cleaned up the metal support and cleaned and adjusted the switch contacts. Finally, I cleaned the target faces with Novus 2.

I then applied the new foam pieces which I had bought over a year ago, making sure everything aligned correctly.

Cleaned targets with nice new foam

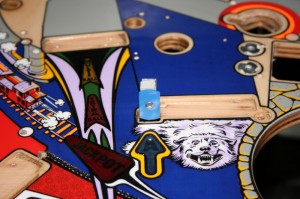
Finally I replaced the broken “Bear target” with a nice new one.

New bear target (that's not my foam alignment)

Update – another mistake

Tuesday, April 13th, 2010

Now you may think that I’ve been up to nothing since my last post, but that’s not entirely true. In fact I made (yet another) mistake:

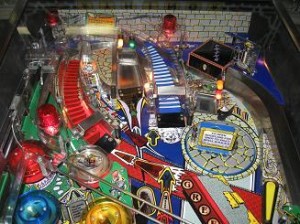
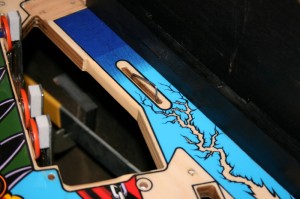
Even though I was so happy with how my playfield had come out, there were still indents around some of the inserts (for example the lightning bolts and the mansion inserts) where the clear just didn’t appear to take and/or had sunk. So, thinking I could repair these small indents, I used the “thin superglue” trick to fill out these indents and to sand them down flat with 2000 wet-and-dry sandpaper.

Unfortunately, in so doing, I managed to sand through my clearcoat on the mansion and on the right in- and outlanes. Even after polishing with Novus 2 and Finesse-It the clearcoat holes were still visible.

Now knowing that these holes would quickly deteriorate in play, I decided to repair these two areas of the playfield. Of course, I should have gone for a complete clearcoat of the whole playfield again, but decided not to, to save time and to not have the bother of the fumes in the house again.

So for the mansion, I decide to build up the clearcoat in two separate layers and (hopefully) feathering the clearcoat edges of each so that the repair wouldn’t be too obvious (and hopefully flat). For the right in- and outlanes (which are more hidden from view) I only used a single feathered layer.
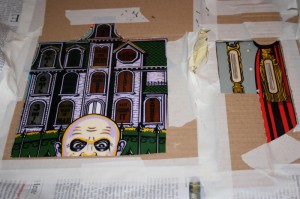
Mask for the repair to limit the amount of clearcoat falling on the playfield
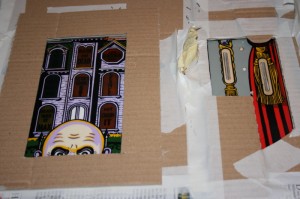
Second layer mask for clearcoat, elevated from playfield (by underlying mask) to create feathering effect
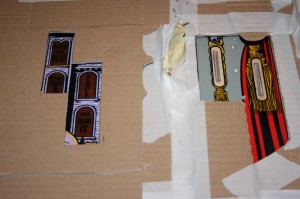
First layer mask for clearcoat, elevated from playfield (by underlying 2 masks) to create feathering effect

After two coats of the first layer and two coats of the second layer (with 5 minutes of breathing time in between) – both in a criss-cross pattern, I left the repair to dry.

After 24 hours of drying time, I noticed that once again, the insert edges (which I had originally tried to repair) were once again indented. This is soooooo frustrating!! This time however, I took my clearcoat, sprayed an amount directly into a plastic beaker and then used a brush to drip the lacquer into the indents. And then I waited……

After Easter (10 days later) it was time to sand down the new clearcoat. In order to prevent a repeat of the issue which caused this whole debacle, I used masking film to protect the untreated playfield, starting the film from half way in the outer “feathered” region of the repair. I then used 1200 grit wet-and-dry sandpaper to flatten the clearcoat. Once I was happy with that I removed the masking film and blended the edges into the playfield, first with 1200 and then with 2000 grit wet-and-dry paper.

For all of the sanding I used water with a little washing-up liquid in it (to help the paper to glide over the playfield) and hardly applied any pressure (as the water made the paper “stick” to the playfield thereby applying its own pressure – one of the benefits of capillary action).

Once I was satisfied with my results, I polished the area with Novus 2 and Finesse-It to bring out the shine in line with the rest of the playfield. Job done!

I did notice, however, that despite all my efforts there were still small pin-head indents around some of the inserts. This time, though, I’m going to leave them as they are.

Incidentally, I have recently bought some Carnauba Wax for the playfield. Even though a clearcoated playfield doesn’t normally need extra wax, this wax can (apparently) fill any imperfections in the surface, which might just help me with my pin-head indents….

Mansion after "repair"