Archive for October, 2008

I’ve been shopping….

Friday, October 31st, 2008

It might seem that I have been neglecting my pinball machine over the last weeks, but on the contrary: I’ve been shopping. So far I’ve ordered the following:

  • Coloured #44, #555 and #906 light bulbs (to see the affect in certain locations)
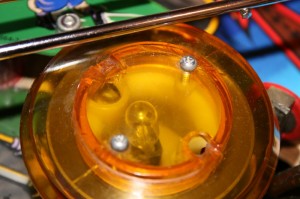
  • Coloured Flasher covers (to try out different colour combinations in each location)
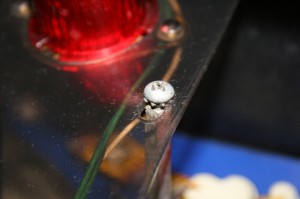
  • Flasher bases to go with the caps (to replace the riveted Flashers)
  • Playfield wax (to wax the playfield once complete)
  • Target spongue (to replace the missing spongue and to replace the existing spongues where necessary)
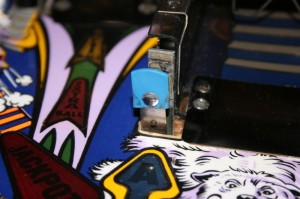
  • A blue oblong target (to replace the broken bear target)
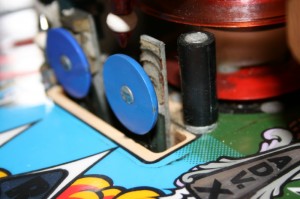
  • Plastic protectors (for the sling shots and bookcase plastics)
  • Perspex (to do my own set of target covers and/or plastics…maybe)
  • Mylar (for the target covers)
  • An imperial box-driver set (my metric tools just wouldn’t always work!)
  • Modeller’s wood (to take on some repairs to the cabinet and playfield)
  • 3M double sided tape (this may be needed to stick on my custom target covers)
  • A new bookcase set (to replace the fractured bookcase)
  • A full set of replacement bulbs (just in case)
  • A full set of rubber parts (to replace the current rubbers, which don’t have the right colours)
  • A full set of fuses (just in case)
  • A full set of jet bumper tops (to replace the existing fractured tops)
  • An almost complete set of NOS plastics (to replace the current plastics, which definitely need freshening up)
  • An almost complete set of used plastics (just for the hell of it)
  • Novus 1, 2 and 3 (to assist me in my clean up of the playfiled and plastic parts)
  • 3 new pinballs (to treat my pinball machine)
  • Protectors for all of the out holes (to protect the holes and cover up the damaged areas)
  • Some LED based #555 and #44 lamp replacements (to try out)
  • A set of 18 different coloured acrylic paints (to touch up the playfield, where necessary)
  • 1 ounce of Lightning Blue Paint (to touch up the lightning on the cabinet)
  • Paint brushes (to apply the acrylic paint)
  • A cheap “Dremel” equivalent (to help with the cleaning and polishing)
  • A set of blue steel metal ramps (to replace the existing ramps)
  • A tool-less rivet set (to attach the parts requiring riveting without investing in an expensive riveter)
  • A Hurley Riveter (OK, so I foud a cheap alternative to apply normal rivets)
  • A new shooter (to replaced the current chipped one)
  • 3 slow burn 3A fuses, board and wiring (to update the power circuitry supplying the magnets to prevent future magnet burn)
  • A set of TAF Gold Roms and a “Home” H-4 rom (to try out)
  • An 11 pin Molex plug and pin strip (to replace the burn-out plug and connecting strip -J126- on the power board)
  • An LED based dot-matrix display from PinLED (to try out)
  • A new updated version of the WPC Power Board with modern components from PinLED
  • A new updated Fliptronic I/II board from PinLED (although the TAF will only require the Fliptronic I part, as the equivalent Fliptronic II board is located separately in the back box)
  • A set of four leg protectors in blue (to hide the damaged wood on the main body behind each of the legs)
  • A tumbler (to clean the metal parts of the pinball machine)
  • Decals for the arch and pinball machine front (to replace the damaged decals)
  • Decals for the cloud top (as one of the decals has started to peel off)
  • Decals for the bookcase (as I too am of the opinion that the blue bookcase just doesn’t suit the game)
  • A set of insert decals (don’t know why I bought these really)
More Display Problems

Thursday, October 23rd, 2008
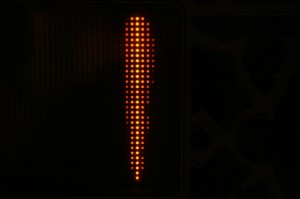
Over the last two weeks I’ve successfully contacted the seller and agreed to have him exchange the faulty dot-matrix display (with columns 127 and 126 not functioning) with a fully functioning one. I received the “new” display today.

Unfortunately this display was suffering with severe “gassing” making it unsuitable for the display.

An example of severe "gassing" of the Dot-Matrix-Display

An example of severe gassing in the Dot-Matrix-Display

Time to contact the seller again….

More problems…

Saturday, October 4th, 2008
Following the identification of the initial problems reported in my last post, closer inspection has now revealed other issues:

1) The Dot Matrix display has two columns (127 and 128) which aren’t working

2) The blue oblong (bear kicks) target is physically broken
Bear Kick Target

Bear Kick Target

3) One of the two graveyard targets has its spongue padding missing

Spongue missing

Spongue missing

4) One of the jet-bumpers (blue) isn’t functioning

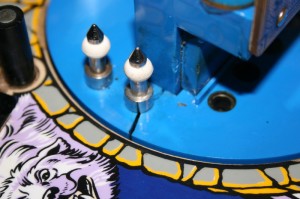
5) The jet-bumper plastics are fractured at the mounting holes

one of the fractured caps (note the repair already carried out)

one of the fractured caps (note the repair already carried out)

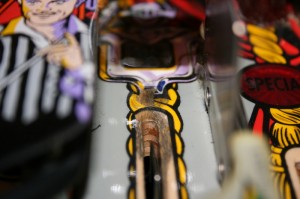
6) The plastic (staircase) ramp is fractured at several mounting holes

A fracture on the main plastic ramp

A fracture on the main plastic ramp

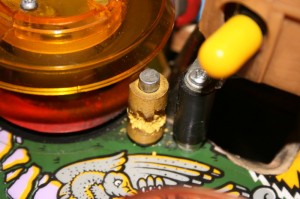
7) Several of the post-rubbers are old and flaking (in particular the yellow tapered bumper and two of the black rubber sleeves)

A well worn yellow post

A well worn yellow post

A worn rubber post

A worn rubber post

Well worn (old) rubber

Well worn (old) rubber

 8) One of the 3/4 inch rubber rings is broken

Broken rubber

Broken rubber

9) One of the 3/4 inch rubber rings is completely missing

Here was once a rubber

Here was once a rubber

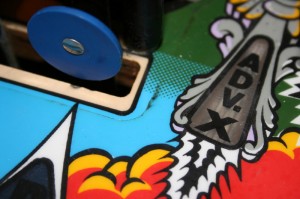
10) Both blue rubber pads on the elevated ramps are missing.

Missing rubber on right ramp ball drop

Missing rubber on right ramp ball drop

Missing rubber from left "Thing" ball drop

Missing rubber from left "Thing" ball drop

11) The bookcase is fractured in several places

Crack on bookcase

Crack on bookcase

Crack on bookcase plate

Crack on bookcase plate

12) There is evidence of “magnet burn” on the playfield (lower left magnet)

Example of magnet burn

Example of magnet burn

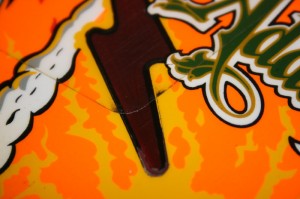
13) Where the playfield would appear to be “burned” some of the paint has flaked away.

Flaking paint under burn (click picture to enlarge)

Flaking paint under burn (click picture to enlarge)

14) The paintwork around the power insert has been worn away

Worn paint to bare wood around The Power insert

Worn paint to bare wood around The Power insert

15) The paintwork under the ramp drop on the right flipper lane is damaged

Warn paint to wood under ramp drop on right side

Worn paint to wood under ramp drop on right side

16) The edges of the mylar protecting the playfield have accumulated dirt and don’t look too good

Typical accumulated dirt under Mylar

Typical accumulated dirt under Mylar

More dirt under Mylar

More dirt under Mylar

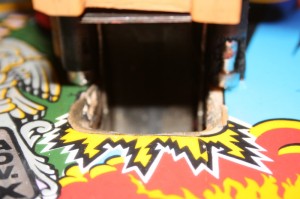
17) The playfield surface around the electric chair hole is severely damaged

Typically damaged outhole under Uncle Fester's chair

Typically damaged outhole under Uncle Fester's chair

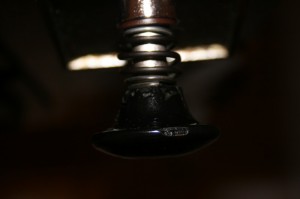
18) The pinball shooter is damaged

Chipped shooter

Chipped shooter

19) The front of the pinball has paint removed (following removal of stickers, I assume)

Black paint removed around sword/logo and an extra decal

Black paint removed around sword/logo and an extra decal

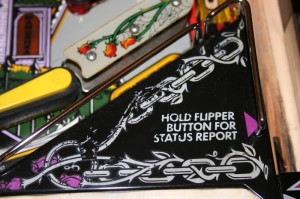
20) The transfers on the apron (or bridge or arch) have been worn away badly

Badly worn decal on right side of arch

Badly worn decal on left side of arch

Badly worn decal on right side of arch

Badly worn decal on right side of arch

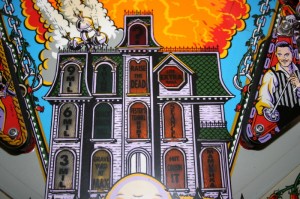
21) The plastic around the inserts in the mansion is worn away (although this is to be expected in a machine of this age)

The house showing some damage around the inserts

The house showing some damage around the inserts

Considering the description of the pinball on Ebay (see the introduction page) I find it incredible that the pinball has been delivered in this condition. Despite the fact that the pinball I have received is not as described in the auction, the time and effort which I have invested to-date (including getting the pinball machine down into the cellar) make it very difficult for me to return the pinball machine to the seller. As such I have decided to try to work with the seller to alleviate as many of the problems as possible and at the same time to renovate the machine as well as I can.
So let’s get started….

The problems start…

Saturday, October 4th, 2008
I realised having played the pinball for some time that a few things weren’t right. Some bulbs seemed to be burned out and I just couldn’t get the Thing Flips feature to function. So I took the machine into testing mode.
Sure enough, 7 of the bulbs were broken, including 3 Flashers (#906), 1 wedge bulb (#555), 1 bayonet bulb (#44) and 2 backboard flashers (#455). As for the Thing Flips function, the opto switch which switches when the pinball falls from the left rail and channels onto Thing’s flipper (Bumper Lane Opto – Switch #57) wasn’t switching, meaning that the electronics wasn’t recognising when the ball was moving onto the flipper. By simply cleaning the opto transmitter and receiver through the holes in the appropriate housings with a cotton bud soaked in water (with a little washing up liquid) solved the problem. “Thing” started to flip and got more accurate the more I tested it. It was amazing to watch!
Having cleaned up the Bumper Lane Opto I noticed that all of the inserts in the playfield were also incredibly mucky, covered (on the underside) in pinball dust. So I took several cotton buds and a bowl of water with a little washing up liquid and cleaned each and every one of them (drying them with a dry cotton bud afterwards). It was a slow process, but worth it: when I turned the machine back on, the pinball machine was a lot brighter and seemed to glow! Excellent!

The only problem I had was with the “Extra Ball” lamp (bulb 12): because of the right flipper assembly (which almost covers the hole for the Extra Ball insert), I couldn’t get the bulb to illuminate the insert uniformly. This is something I’ll have to address later.

Also, it was interesting to note that in testing the flashers an interesting anomoly became evident: whenever one of the flasher circuits had a bulb which wasn’t working, at least one of the flashers in an adjacent circuit flashed in sympathy, but not at full brightness, in a kind of “cross-talk” way. Strange, but true. I’m not sure if this is a problem with the power board, or the wiring or something else, so it’ll be something else to put on the back burner for later.

Incidentally another issue I identified whilst testing the flashers was that how difficult it was to get to the train-wreck, mini-flipper and telephone flashers. Unlike all other flasher caps these three caps were rivetted to their plastic, meaning that the plastic has to be removed to get at the bulb. A difficult and cumbersome task – especially for the the telephone flasher. I have no idea and can see no reason why these couldn’t be converted to a base with a screw in flasher cap for easier replacement. So I’ll take this as a future project also.

Finally in going through the switch test, I found something really odd: whenever I operate the Left Outlane Switch, the Thing Opto Up switch turns off also (it’s normally on). These two switches are adjacent to one another in the switch matrix and share the same row. This is something I’ll need to investigate in the near term (although it doesn’t appear to affect the play of the pinball).

Unfortunately though, my problems didn’t stop there…

Mounting the back box and switching on

Saturday, October 4th, 2008

I mounted the back box back onto the pinball machine securing the external hinges and internal wing nuts and then connected up all of the connectors onto their respective pin headers. I’m glad I had numbered all of the connectors! Everything went smoothly (apart from connector J126 whose far right pin was loose, meaning I had to remove the board to push the pin from the back into the connector. It was here that I noticed that the board had actually been “repaired” with a wire leading from this loose pin to another pin for connector J125). When I was finished it certainly looked as it had done before I took it all apart.

Despite the fact that I hadn’t yet levelled the machine, I put the three pinballs into the outhole, held my breath and switched the machine on…..

The lights came on, the bookcase did a turn, a loud “boing” eminated from the machine, the three balls got ejected into the machine and that was it. The display showed “Addams Family” and I was happy. Very happy.

So I thought I’d play the machine for the first time.

Despite the fact that the machine had been set to Free Play (according to the eBay description) it wasn’t. I put a 50 Euro Cent into the machine and got 2 credits. I put a 1 Euro coin into the machine and got 5 credits and then put a 2 Euro coin into the machine and got 15 credits. Strange. But I was too excited to care, so played the machine. It was great, just as I had remembered it. But it was so loud (for my cellar) and really reverberated. Great for a pub environment, but not for my cellar.

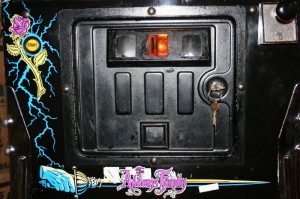
So I opened up the coin door and tried to adjust the volume using the volume buttons. Nothing happened. I tried to switch the machine into the Menu System by pressing the “Begin Test” button. Nothing happened. No matter which button I pressed it didn’t have the desired affect. Something was definitely wrong.

So had I been sent a duff machine or had I done something wrong? And if so, what? My first port of call was the back box and all of those connectors. Not knowing which board was responsible for what, I thought I’d start from the left and work my way through all of the connectors. So I turned the machine off and started with my hunt.

The first connector I looked at was J205. Sure enough, the connector was off by one. I had managed to connect this connector up incorrectly! So I corrected this mistake and without checking the other connectors switched on again.

The first thing  I tried to do was adjust the volume again behind the coin door. Sure enough, it worked! Boy was I relieved! I put a 50 Euro Cent coin into the coin mechanism and got a half credit. Things were certainly looking up. I pushed the escape button and got a full credit. YES!

Having set the volume to its lowest level it was still too loud. I remember from flicking through the manual there was a fixed lower volume level which could be overridden. So a quick consultation of the manual and a few adjustments later I was able to get the volume down to an aceptable level (for my cellar). And then I played. Boy was it FUN!

But then I noticed a few anomolies….

Getting the machine onto its feet

Saturday, October 4th, 2008

My mate Lennie’s son came around at 11 o’clock this morning. He was meant to help me with getting my pinball machine down my spiral wooden stairs….

To my surprise it went without much of a hitch. After just 10 minutes the pinball machine was in the cellar of the house and ready to have the legs mounted.

I wasn’t sure how best to mount the legs. Whilst surfing over the last couple of weeks, I remember seeing a web-site with recommendations on how to do it, and that it was necessary to be careful because of the weight of the machine. As I hadn’t bookmarked this page it wasn’t easy for me to find it again, so in my impatience I just attached the legs one at a time to each of the four corners, trying to match up the legs with the “indents” in the corners of the body.

Pairing the legs up wasn’t too difficult, as the height adjusters for each pair (of front and back) were very different, two legs being far more extended than the other two. I assumed these were the back legs and tried to match each leg with the indents as best as possible. I did the same for the front legs.

To transport the pinpall (on its back) I had used a trolley and the body was still on the trolley, so it wasn’t too difficult to fit all four legs on to the body of the pinball, as even the bottom corners were exposed.

A WORD OF WARNING: I used a wrench to tighten the leg bolts. Despite the fact that I had tried to be careful, I actually managed to overtighten one bolt in one of the legs and can only assume I stripped a thread, as all of a sudden the torque force reduced considerably. I immediately stopped tightening and left the bolt as it was. Not very professional I know, but I’ll keep my eye on it.

Now to the task of setting the pinball upright. I was really concerned with leveraging the pinball down on just two legs, just because of the weight of the thing. However, not having any other alternative I just went for it – the theory being, if I took enough of the load whilst lowering the machine, the rear legs wouldn’t come under too much stress.

So having put a mat on the floor under the bottom of the rear legs (to prevent them from slipping) I took the top of the pinball by the front legs and pulled the front down. This was easy until the rear legs met the mat and I had to force the front down taking as much of the weight as possible.

It all happened quite quickly after that. I got the machine onto its four feet and it was actually stable! Maybe I had done everything right!

…still waiting

Friday, October 3rd, 2008

From the time of winning my TAF on eBay and the delivery of the pinball machine, what seemed like ages have gone by. Time enough to do some research in the internet to see what was available for my newly acquired “toy”. The four most important items I have found online to-date are:

  1. The 1992 TAF Manual
  2. The 1994 TAF Special Collectors Edition Gold Edition manual
  3. The TAF Operators manual
  4. The WPC Schematic Manual

Interestingly, a lot of web-sites offer these manuals online for a fee of between 10 and 30 Euro (or Dollars)!

In addition, I found plenty of useful web-sites, a list of which can be found here (in no particular order and is continuing to grow by the day). See comment below….

From this research, I was excited to discover the “Thing flips” feature, where a flipper automatically shoots a ball into The Swamp with better accuracy than a human. In fact, this flipper function is continuously improving itself to improve its accuracy. Now this sounds an interesting feature and is something which I, for one, have never been aware of! I look forward to trying it out….

Also the diagnostics menu is new to me and is something I’m also looking forward to trying out….

Day 1

Wednesday, October 1st, 2008

The pinball arrived today. Boy was it heavy!

Couldn’t get it down our stairs into the cellar as it was too wide, so decided to take off the backbox (to reduce the width and weight).

First task was to find the backbox key which wasn’t hanging on the hook on the inside of the coin door as it should have been (according to Stephan Schubert, the previous owner of the pinball).

A couple of ‘phone calls later with Mr. Schubert established the fact that the key must have fallen inside the machine. To get at the inside of the machine it was necessary to:

  1. open the front door
  2. pull the yellow locking lever
  3. remove the chrome cover at the front of the pinball by lifting it upwards.
  4. carefully slide the glass out of its channels and removing it to a safe place
  5. lift the front of the playfield by putting a hand in the outhole and lifting the playfield upwards.

The playfield hinged up from the middle and could be tilted back the whole way into a more-or-less vertical, but stable position. Boy was it black inside the machine! Everything was covered in “soot” (which I have now come to learn as being called “pinball dust”). I can only guess that this dirt has come from a combination of burning contacts within the pinball and smoke deposits from the environments in which the pinball had been played in its 16 odd years of existence.

Sure enough, with the aid of a torch, I found the key inside the pinball machine.

Removing the front graphic from the pinball backbox was a simple task of gently removing it having unlocked the box with the key (the lock is located in the middle of the backbox at the top, on the inside edge). The bulb-filled board behind it was easily hinged open by lifting the latch on the right side and opening the door (This latch can sometimes be fixed with a screw, but mine wasn’t). That’s when I found the “rat’s nest”.

So in order to remove the backbox meant disconnecting all the plugs from all of the pin modules on all of the PCBs in the backbox. And there were quite a few. Prior to removing each plug, I carefully noted the jumper number (printed on each PCB next to each plug) on the right hand side of the plug with a permanent felt-tip pen. All of the pin modules which didn’t have a corresponding plug I marked with a cross. Otherwise it would have definitely confused me at rebuild time!

Having removed all of the plugs and having detached the hinges from both sides on the inside of the backbox, followed by the mounting wing nuts attaching the box to the main body, I was able to gingerly lift the backbox off of the main body.

I carefully laid the two large cable harnesses on top of the pinball and put the backbox to one side.

And waited….

How it all started….

Wednesday, October 1st, 2008

(Go here for latest page)


I had always wanted an Addams Family pinball machine. I have no idea when I played one for the first time, but I do remember thinking having played it just the once “how do I get that hand to come out again?”

I’m no pinball freak/wizard/expert. I’ve only played pinball a few times (once a year, on average, would be overstating the facts) but there was always something about The Addams Family pinball that kept me intrigued.

I first toyed with the idea of buying a pinball machine for myself in 1996. But didn’t. I got as many brochures as I could from gaming providers at that time and read the descriptions of all the pinballs on offer, but still kept coming back to and focusing on The Addams Family pinball. But still I didn’t invest the 4,150 DM for a new machine at that time.

Fast forward 12 years. I’ve got the house, the wife, the kids and a surprise bonus from my employer……and still an itching to acquire a pinball machine. So, first stop, Ebay.

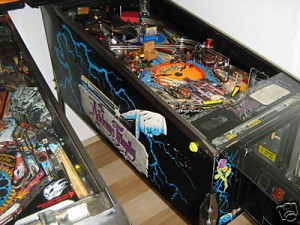
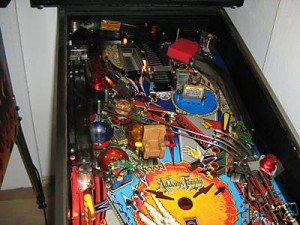
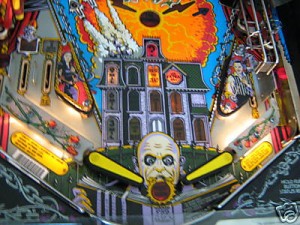
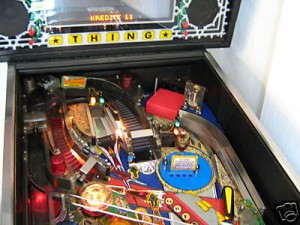
To cut a long story short, I found the following TAF (The Addams Family) pinball machine on ebay:

Zum verkauf steht hier ein traumhafter KULT FLIPPER ADDAMS FAMILY – natürlich ist die wolke auch vorhanden !!!
For sale a wonderful cult Addams Family pinball – with cloud, of course
die maschine wurde aufwendig überholt alle verschleißte gegebenenfalls erneuert ( gummis und leuchtmittel natürlich auch )
the machine has been extensively restored, all worn parts replaced where necessary (rubbers and lamps included of course)
ca. 18 stunden hatt die überholung an zeit in anspruch genommen !!!!!!!!!!!!!!!!
the restoration took around 18 hours
die flipperarme haben volle kraft ,
the flippers have full power
die dot matix ist einwandfrei ,
the dot matrix has no faults
der flipper verfügt über einen euro münzprüfer , zur zeit eingestellt auf frei spielen
the pinball has a Euro coin mechanism, which is currently set to free play
die spielflache wurde gereinigt und mit spezialwachs versiegelt .
the playfield has been cleaned and sealed with special wax
die plastikteile sind ohne beschädigung / spielfeld keine abspielungen
the plastic parts are not damaged / the playfield is not worn
es handelt sich um ein Privatverkauf , somit gibt es keine Ansprüche oder Rückgabe des Flippers. Versandkosten übernimmt der Gewinner dieser Auktion, Ebay übernehme ich..

abholung und probespielen natürlich gerne gesehen …

versandkosten 90,- €uro, zahlung und abholung innerhalb von 7 tagen , bei fragen 016095676982

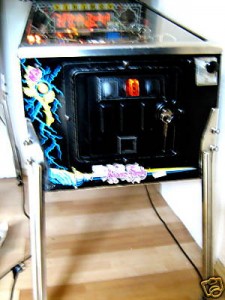
Attached were the following photos:

I made a bid on this pinball and won it for 1,630 Euros.

This blog is about what happened next……

The intention of this blog is to take the reader through my learning process (as I have no idea what I’m doing – yet), what I did, why I did it and how I did it. My intention, as you will see, is to restore this pinball as best I can with the help of the world-wide community existing on the internet. I will endeavour to investigate the best way of accomplishing a task and report on the task, summarising my results.

Hopefully at the end of the day, this will result in a document complimenting the vast amount of excellent information already available on the internet on pinball restoration and maintenance.

Enjoy!