Archive for March, 2013

First fault finding

Friday, March 15th, 2013

Back to the mysterious flipper firing together with the lamps, when all the lamps were on and flashing.

My first guess was that there must be some kind of cross talk on the power board and so was just about to check the circuit diagrams to see how on earth that could be happening, when I thought I’d first check to see if the problem also happened when the left flipper switch wasn’t connected. It didn’t. So could there also be some sort of cross talk with the switch wiring, somehow? Then I discovered something very curious…

The interrupter for the opto flipper board was slightly misaligned to the opto switch, this made the flipper switch very sensitive. On aligning the interrupter with the switch manually, the flipper no longer activated together with the lamps. So it would appear that the current drain from all the lamps being on at once affected the threshold of the opto-switch ever so slightly, so that it then switched, because it was near to its switching threshold anyway (due to the receiver receiving light from the transmitter even when it was supposed to be off) thereby firing the flipper bat.

Unfortunately trying to physically bend the interrupter into shape didn’t work. In the end I switched the left and right opto boards and the problem was solved.

Job done.

Jet Bumper spring

Friday, March 15th, 2013

I received the jet bumper spring from a local shop today and fit it into the weak jet bumper. It didn’t work. I took it out again and compared it to the one that had been in there originally – it was the same (a 10-135). Time to order the right one – again!

I had been doing a bit of research into springs, as you do, and discovered that the strength of a spring is proportional to the thickness of the wire and inversely proportional to the coil diameter and the number of turns in the coil. So, as I now have to wait until I receive the right coil, I thought I’d do a little experimenting. So I took a turn out of the coil:

10-135 spring on left - minus one coil on right

10-135 spring on left – minus one coil on right


I put this coil in the pop bumper, but it also didn’t work! Guess I’ll have to wait for the right spring after all!

AFM lights up for the first time in over two years….

Wednesday, March 13th, 2013

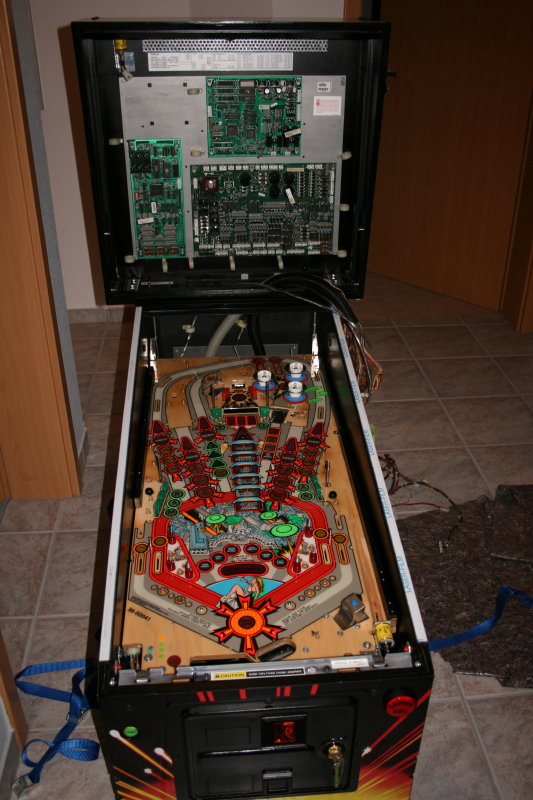
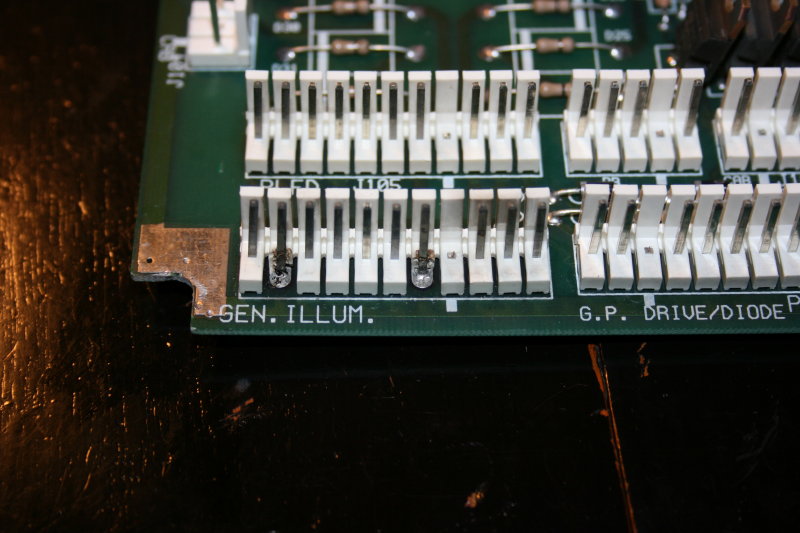
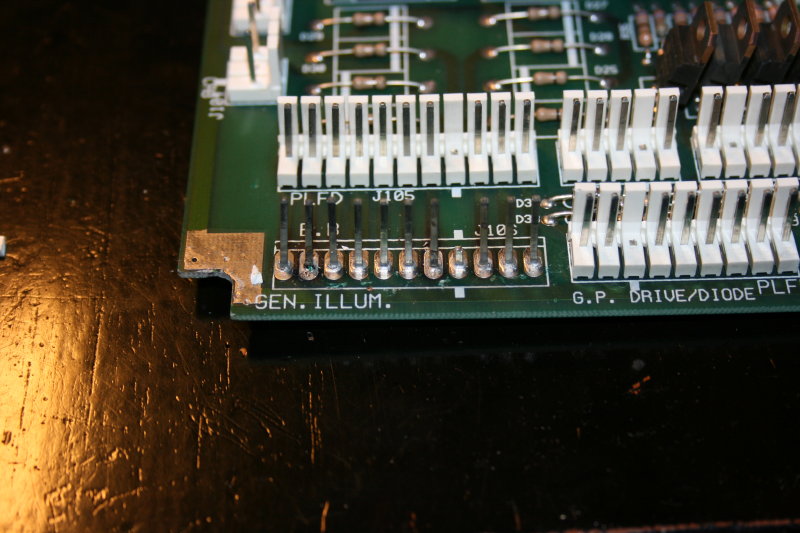
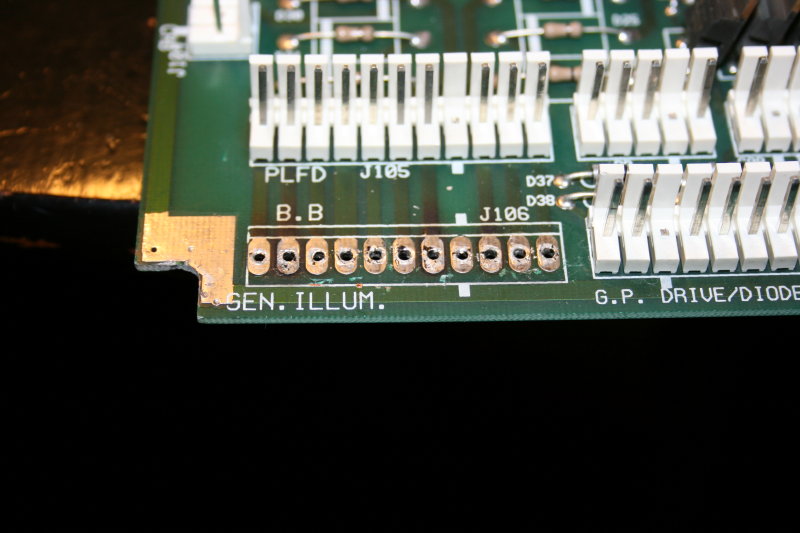
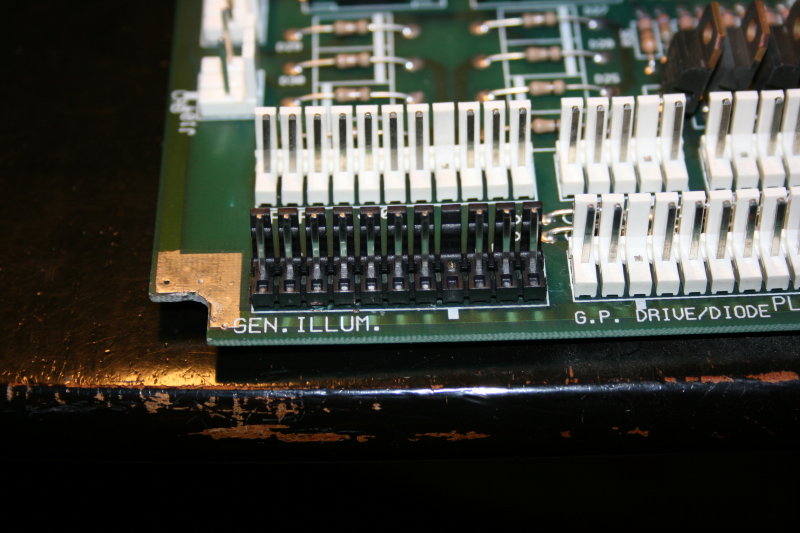
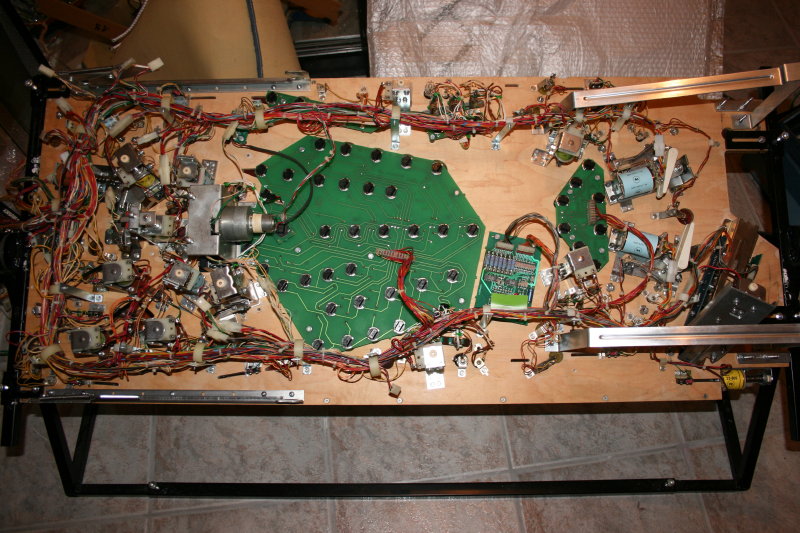
Well I got the playfield and all the boards connected up today – it all seemed to make sense actually, which was a good feeling and I discovered in the process, that I had actually incorrectly marked up two of the female plugs! I also managed to plug J105 onto J106 by mistake and in trying to take it off again, broke two retainers off of the male part on the PCB (which I had so carefully soldered onto the board), so I just left it on there. It turns out that I will be needing to plug J105 onto J106 for the “black-out” mod anyway, so that’s another reason why it can stay on there for now (both connectors are connected in parallel to one another).

I attached the outlet cable into the back of the machine, the loudspeaker panel and then (very nervously) switched the machine on.

The GI lighting came on and a message kept repeating in the display, in French. There was no smell of smoke.

So I turned the machine off, turned the “country” dip-switches 7 and 8 on the CPU board to “off” and switched the machine back on agian. The GI lights came on and the message came up in English. Something about the book keeping numbers being reset, or something. Not a surprise really, as I had already taken the batteries out of the CPU before cleaining it and connecting it in to the machine.

So I went into the test menu and tested everything I could test and everything passed with flying colours – apart from two small issues:

1) the metal ring of the lower jet bumper would not return to the upper position once activated. At first I thought the coil was permanently on and panicked, switching the machine off. I then remembered that as I was putting the jet bumpers together, one of the bumpers had a spring in it, which was notably weaker than the other two. I made a mental note at the time. This weaker spring was in this lower jet bumper. So I switched the machine back on, went through the test menu again until I got to the lower jet and put it into test mode. As the metal ring was drawn down I applied a little pressure to lift it again and once the coil had deactivated, sure enough, the ring popped back up. So I obviously needed the right spring.

Now according to numerous shops, there are two “suitable” springs for the pop-bumper a 10-326 and a 10-135. However, looking into it a bit deeper, the 10-326 is used in the pop-bumpers only and the 10-135 almost everywhere else (for WPC machines). I suspect I have a 10-135 in the pop-bumper and require a 10-326.

Incidentally, why the metal ring doesn’t return even with the weaker sping is something I find peculiar: when the coil de-activates the ring stays down; by applying a slight pressure under the ring it then pops up again. But then trying to get the ring to stay down again manually is impossible, with the spring returning the ring to the upper position every time! So I’m guessing that when the coil activates it draws the plunger down until the plunger hits the end-stop. When the current is removed from the coil so that the magnetic field collapses, there must be a residual magnetism in the plunger and coil stop which holds them together. As soon as this bond is broken however, the residual magnetism dissapears. Sounds plausible. The spring therefore needs to overcome this force of attraction and that caused by the weight of the ring. If it is unable to do this, the ring stays down until broken manually. Solution: stronger spring (I verified this by temporarily using two 10-135 springs instead of just one – thereby doubling the return force, which worked).

2) The second problem was also interesting: in testing the lamps in “all lamps+flasher” test the left flipper bat activated in time with the strobing lamps. It also activated with the strobing lamps in the “all lamps” test. But I couldn’t get it to activate in the “single lamp” test or the “column/row lamp” test. Also activating the flipper using the flipper button didn’t light up any lamp(s). I’ll investigate this one later….

Getting it together

Friday, March 8th, 2013

So I put the clean (repaired) boards into the backbox today and also put the playfield back in. A milestone in my renovation to say the least!

The playfield is "back home" where it belongs

The playfield is “back home” where it belongs


Oh and look there, I’ve also received and mounted the START button!

Happy Birthday Dad

Friday, March 8th, 2013

It would have been my Dad’s 89th Birthday today. Happy Birthday Dad and RIP.

Back to pinball….

I cleaned up the PC boards today and having cleaned the Power Board, noticed that J106 (the GI lamp plug) had been burnt on two pins

Burnt GI lamp plug J106

Burnt GI lamp plug J106


So one minor repair later, I was ready to go….
Off with the old

Off with the old

Remove pins

Remove pins

And on with the new (high temperature rated)

And on with the new (high temperature rated)

Playfield DONE!!

Wednesday, March 6th, 2013

So I fixed up the lamp loom (having replaced all of the lamps) and attached the coil/flasher cable to each of the coils*, cleaned up the playfield hinges and supports and attached them and voila – playfield DONE!!!!

One clean and one dirty playfield support.

One clean and one dirty playfield support.

Playfield bottom

Playfield bottom

Playfield top

Playfield top

* I had decided a few months back, that it would be much easier when putting everything together, to firstly cut the coils from the coil cable loom, put a plug and socket on each of the coils/coil loom cables, mount the coils into their associated mechanics and then mounting each individual unit, complete with coils, onto the playfield, than to try to juggle a cable with coils hanging off it. It proved to be quite easy in the end.