Archive for February, 2010

Saving the playfield – part 2

Thursday, February 25th, 2010

Not wanting to damage my touch-ups and decal, I gingerly sanded down the playfield with 2000 grit sandpaper (dry).  I then cleaned the playfield thoroughly firstly using a small vacuum cleaner to remove the dust; then a damp cloth to remove any other dust and finally a tack cloth. I applied two coats of 1K clear-coat  from a new spray can – each coat consisting of one horizontal and one vertical layer criss-crossed – moving the spray head much slower than for the first coat. I left at least 5 minutes before applying the second coat to let the first coat breath.

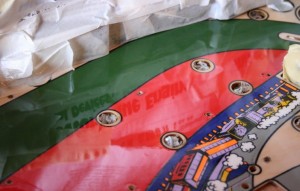
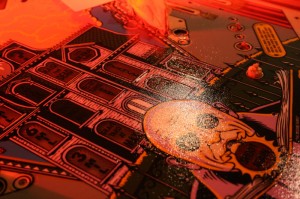
I was happier with the results even though they weren’t perfect, showing a so called “Orange Peel” effect:

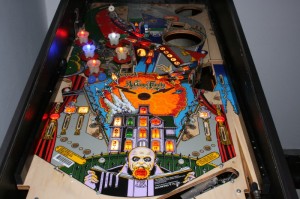
Playfield after a second (wet) coating of clear-coat

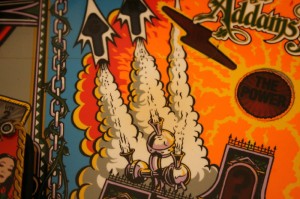
Obvious Orange Peel appearance of second coat

It turns out that this Orange Peel affect was as a result of the uneven first layer. This was evident, as I had also clear-coated part of the playfield this time which had been protected during the first clear-coat:
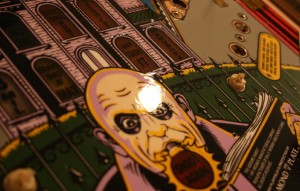
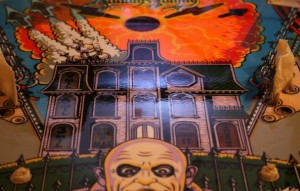
Clear-coated section of playfield not spoiled by uneven first coat

Saving the playfield – Part 1

Saturday, February 20th, 2010

So, having ruined the playfield (see previous post) I opened a thread on flippermarkt.de to find out what the “experts” thought of my situation and how it could have happened (and how to repair the problem).

The main possible reasons given were:

  1. a dirty playfield
  2. the spray can or playfield were too cold
  3. a lack of pressure in the spray can
  4. a reaction to the original Diamond Plate
  5. clear-coat applied too wet

1 and 2 were definitely not applicable in my case. 3 might have been, but I doubted it. Because of the actual 1K used, 4 should also not have caused a problem. 5 I’m sure wasn’t the case.

So no help there then.

As a solution, nearly everyone recommended I remove the far inferior 1K clear-coat from the playfield and to use 2K instead. This would mean me having to either sand down the clear-coat to the original Diamond Plate, or (preferably) to use a solvent to remove the 1K. This would, of course, affect all of the touch ups I had done up until this time and would therefore not only take a lot of time, but cost me a lot of time already spent. So I decided not to follow these recommendations.

Instead, I decided to follow the advice that I let the clear-coat harden and then sand the playfield down slightly and then apply fresh coats of clear-coat. Through additional research, I determined that maybe I had actually sprayed the clear-coat on too dry (ie moved the spray can too fast across the playfield) which could easily be remedied by spraying a little slower. However, when spraying wet it is important to have a horizontal playfield (to prevent runs in the paint) and to ensure that each coat has a chance to breath (to let the solvent out) otherwise the solvent will be trapped and eventually force its way out as the coating dries resulting in small holes in the clear-coat surface.

Clear-coating the playfield

Friday, February 19th, 2010

In order to prepare the playfield for clear-coating I started by dry-sanding the exposed area with 1200 grit wet-and-dry sand paper ensuring the whole exposed playfield was “roughed-up” and dull in appearance. I vacuumed up the resulting debry from the playfield before using a damp cloth to remove any dust remaining and just to ensure there was absolutely no bits left on the playfield, wiped it down with a tack-cloth.

I then took my spray-can of 1K clear-coat varnish and applied four light coats of clear-coat, each coat consisting of both a horizontal and a vertical spray pattern in a criss-cross pattern. I left 5-10 minutes between each coat to give each coat an opportunity to breath. This methodology was chosen having read many different guides on clear-coating on the internet.

So it came as a big surprise when the resulting clear-coat came out disappointingly:

First clear-coat covering

Time to turn to one of my local forums (flippermarkt.de) for help.

Preparing the playfield for clear-coating

Thursday, February 18th, 2010

In order to prepare the playfield for clear-coating I needed to cover the pop-bumpers in the graveyard. And as the playfield is still in the pinball machine I had to protect the cabinet also.

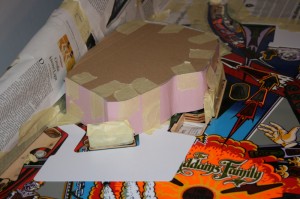
For the pop-bumpers, I constructed a custom box cover which fit snugly over the pop-bumpers and held it down to the playfield with masking tape, using the stand-up targets as anchors:

Graveyard cover

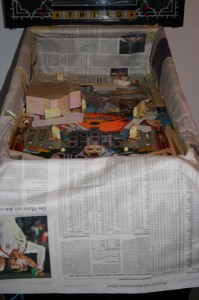
The cabinet was then protected with newspaper:

Playfield ready for clear-coating

Incidentally the photos above show that I had originally protected the rear of the playfield as I only wanted to clear-coat the visible areas of the playfield. This, however, would have have made sanding the exposed areas of the playfield harder than it needed to be, so I removed it again, thereby exposing the entire top half of the playfield.

Masking the Mylar

Wednesday, February 17th, 2010

For those of you following this blog, you’ll know that I’ve decided to only part clear-coat my playfield. The reason for this is because I always wanted this renovation to be quick and easy (OK, so it hasn’t been quick, but it’s certainly been a lot more easier than doing a complete playfield clear-coat).

I’ve also decided to keep the mylar on the playfield – after all it doesn’t look too bad and serves its purpose well and it would also be a lot of work taking it off and cleaning up the sticky mess afterwards (apparently).

In order to proceed therefore, I require mylar protectors so as not to clear-coat the mylars when I clear-coat the playfield – otherwise the mylar would effectively be sealed in to the playfield.

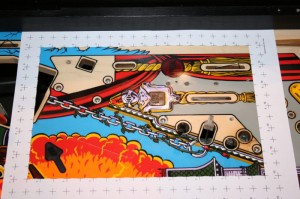
I started by photographing the two mylar areas to be protected, bordered with a measuring frame in order to correct the size and perspective of the resulting photograph:

Swamp Kickout Mylar

Electric Chair/Graveyard Mylar

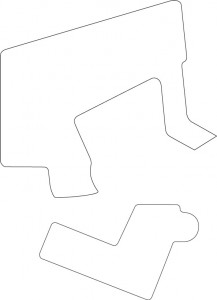
Having then corrected the size and perspective of these photos in Photoshop I imported them into Illustrator and traced around the mylar edge to produce vectors to plot on my CraftRobo plotter/cutter:

Vector drawing of mylars

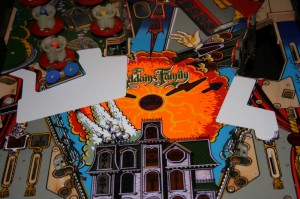
I then cut these shapes out of both masking foil and 4mm masking plastic and stuck the foil in place on each mylar on the playfield and then the plastic with double-sided sticky tape on each foil:

Mylar protectors in place

Ablaze LEDs

Friday, February 12th, 2010

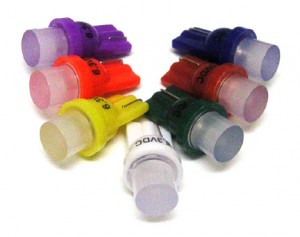
I was following a thread on RGP and came across some new LEDs which were meant to be better and cheaper than other LED solutions for pinball machines from Pinball Life. I’ve always had a desire to use LEDs for the pop bumpers and one of the #555 wedge base lamps equivalent was available with a frosted lense and flat head. This, I thought, would be ideal for the pop bumpers:

Ablaze 1-LED #555 Wedge Base Lamp With Frosted Lens

Even though the LEDs only cost 39 US cents each, shipping them from the US to Germany would have cost $28. So an alternative solution needed to be found.

Fortunately on RGP I found a fellow pin-head who was ordering from Pinball Life anyway and he ordered my Ablaze LEDs for me and then shipped them to me for a measly 2.20 Euros. A lot better!

So I tried them out today and they looked great:

Ablaze LEDs blazing away in the pop bumpers

Application of the Water-Slide Decal

Thursday, February 11th, 2010

For those of you following this blog, you’ll know that I’ve decided to use a water-slide decal to cover the white cloud area above the house to the left as it has magnet burn:

White cloud showing brown area of magnet burn

I’ve produced the graphic from a scan and ensuring the colours are right (a very long winded process) printed the graphic out on water-slide decal paper:

Water-slide decal

I then used a clear lacquer to protect this decal before cutting it out, half way through the black outline.

I then immersed the decal in water. The decal curls up almost immediately as the backing paper quickly absorbs the water from the outside inwards. As the water reaches the paper/plastic interface, however, the decal straightens out again and this is then the time to take the decal out, as the water has reached the adhesive at the paper/plastic interface.

Applying the decal was not so straight forward, as the plastic part of the decal is quite brittle and can break easily once separated from the backing paper. Fortunately I found this out on an earlier attempt and so knew what to look out for. However, once the decal was on the playfield, positioning wasn’t too difficult as the water ensures it can be moved relatively easily.

However, I must warn at this stage that moving the decal on the playfield damages the edges slightly and if the edge has black ink on a white paper, this becomes very evident:

Applied decal showing damaged edges

It was possible to cover up these damaged areas with a bit of touching up, however, resulting in a nice new white cloud:

Cloud decal applied and touched up