Archive for the ‘TAF’ Category

Had a quicky!

Sunday, March 22nd, 2009

I was in the cellar today and was joined by my three year old son. He saw my pinball and wanted to play it. As I’ve already removed the Thing hand, motor and mechanism, I really didn’t want to, but he was so insistant!

So I turned on the pinball and I got the error messages, that Thing’s Optos weren’t working (no surprise there, as the opto board wasn’t connected either). But still the machine went into attract mode. My son was so excited.

I set up a few credits,  set my son on a chair and started a game. And everything worked. Amazing (especially after my “machine shake” experience from last month!). However, Thing Flips (where the second left flipper automatically flips the ball into the Swamp) wasn’t too accurate. So I stopped by son from playing briefly (which he didn’t like) and “trained” the system by activating the first inlane rollover switch (Lites Thing Flips) and sending the pinball (manually) up the centre ramp. Sure enough, after 6 iterations, Thing got it right – incredible!

Through all this, my son was watching totally awestruck. And when I let him play again, he kept on trying to catch the ball on the playfield in order to throw it up the centre ramp! Having gently persuaded my son, that this wasn’t really the done thing, we got on with playing again. And boy,  it was fun.

After this short session, I decided to change the machine configuration to give my son (and me) a longer stay at the table per game in the future, by increasing the number of balls per game from 3 to 5. This was simply achieved by opening the coin door, putting the pinball into system/programme mode (by pushing the right button of the set of four buttons on the back-side of the door twice) finding the right configuration (01 under the Adjustments menu) and setting the number of balls to 5. The escape button (far left button on the bank of four) is then used to revert the pinball back to Attract mode, ready for the start of a new game.
Credit where credit’s due

Tuesday, March 10th, 2009

I had been meaning to take a look at it for some time and today I managed to solve the problem:

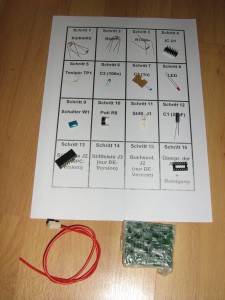
Between the coin mechanism and coin processing board in the pinball machine, there’s a mini PCB with an LED, a row of mini-switches an IC and a miniature potentiometer. I wanted to know what each of these parts did.

Originally the pinball machine came with three coin slots for three different coin denominations. These three had been reduced to just one coin slot able to take three different coins in my machine. The output from this coin mechanism was then taken to the mini PCB and the output of this board taken to the coin interface board of the pinball. So my assumption was, that this mini PCB took the data signal from the coin mechanism and converted it into coin pulses (the number of pulses being directly linked to the value of the coin inserted), which were then registered by the coin interface board on the pinball. But what was unclear to me was what each of the controlls, particularly the potentiometer and mini switches did.

So I carefully prised the PCB off of its mounting and discovered that it was a miniCredit V1.0 from a company in Germany called DoubleYou GmbH (an interseting name for a German company, especially in a country where the locals have a problem pronouncing the letter “W”). This information had been helpfully etched onto the PCB. The board was also copyright 1997, so there was a good chance I might find out more about this board on the internet.

Sure enough I found www.double-you.de. On this site was a product called the miniCredit, albeit in Version 1.1. A quick eMail to DoubleYou confirmed that the two boards were essentially identical and that the documentation for the miniCredit was on the company’s web page (and now available here).

Sure enough the bank of switches sets the number of credits per coin (of which there are only four variants) and the potentiometer varies the length of each “coin pulse”.

Another quick email to DoubleYou confirmed that for any other variants of the number of credits per coin, the PIC processor would need to be reprogrammed by them (at a cost of €15).

An Eprom Programmer (Off Topic)

Sunday, March 1st, 2009
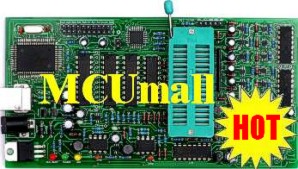
GQ-3X Eprom Programmer

GQ-3X Eprom Programmer

Back in January whilst scouring through RGP (The rec.games.pinball newsgroup) I came across a post referring to an Eprom Programmer which was meant to be good value for money.

So I surfed to MCUMail (in Canada) and found this Eprom Programmer which looked very interesting. Basically it can connect to a Windows PC via a USB cable and doesn’t need an additional power supply and could programme Eprom devices from the 2716 (16 kBit = 2 kbyte) upwards.

Just what I needed.

You see it turns out that many, many years ago I designed my own LED based Moving Message Panel (MMP). Basically a dot-matrix display. However, the stored messages didn’t move per se, each message was a collection of 4 “frames” which could be displayed one after the other.

To store the messages, I used a 32k battery backed static ram. To get the messages into the static ram, I used a memory expansion board on my then Commodore VIC20 (yes, it was a long, long time ago), having taken out one of the static rams from the expansion board and replaced it with an IC socket, into which I could plug my battery backed static ram. It was then simply a case of “poking” the correct values into the correct memory locations for each of the messages.

When the messages were completed, I then only had to take the static ram out of the expansion board and plug it into the MMP – because of the piggy-backed battery, the SRAM didn’t lose the data on the removal of external power.

It was a simple solution and worked – the only caveat being, that the battery had a life expectancy of 10 years…

Having recently “found” my MMP again, I turned it on, not expecting to find it working (as not only was it far more than 10 years ago that I programmed the SRAM, but the MMP had been through 5 house-moves in that time). However, to my surprise, it worked. I was delighted.

So my first thought was to save the messages from the battery backed SRAM to Eprom,  as I wasn’t too hopeful on the battery on the SRAM lasting much longer.

Hence my interest in an Eprom programmer, and one which could programme at least an old TMS2532 32k Eprom, which this one does.

So I bought one.

As far as the (old) 2532 Eproms are concerned, I was delighted to be able to buy some on eBay, meaning that I was now in posession of everything required to commit my MMP messages to a safer medium.

Well today I managed to set everything up and actually read the battery backed static ram into my PC and then to burn the messages to Eprom using my new Eprom programmer. Wonderful. Now that’s one less problem to worry about.

So now I’ve got an Eprom programmer and a pinball machine which uses Eprom for its programme storage. And there are different software versions for my TAF (I’ve already bought the H-4 Eprom and a set of TAF Gold Eproms to complement the L-2 Eprom which came in the machine when it was delivered – in fact it’s the H-4 version which is currently in my TAF). So in theory, I’ve now got everything I need (apart from the software and Eproms) to have an Eprom for each version of TAF software ever written.

I’ll definitely come back to this later.

My 1/4 inch socket mysteriously re-appears

Monday, February 23rd, 2009

Well not exactly….

In my frustration with not being able to find the wretched socket, I was a bit “over-aggressive” with my playfield today. I was so frustrated and angry I shook the playfield (well pushed it up and down actually, but very forcibly and with short, sharp jerking movements – it must have looked funny to anyone watching) and then it happened….

The playfield started to rattle.

A few more shakes later and there was a clunking sound. Sure enough I had shaken the socket loose from wherever it had been stuck and then shaken it out of its location on the playfield and into the cabinet.

My socket was back! I just hope I haven’t ruined my machine in the process.

Pinball Perfect – Service not so!

Thursday, February 19th, 2009

Even though I’ve bought a new Apron for my TAF, it’s the wrong one (it’s a Hurricane) so needs some work doing to it in order to turn it into a TAF Apron (removing current decals, preparing it to paint, painting it black, applying TAF decals and then applying a lacquer finish).

Being lazy however, I continue to look for an actual TAF Apron and actually found a source at Pinball Perfect (www.pinball-perfect.de) in Böblingen, Germany. They actually offered me an Apron for 115 €uro – a little excessive methinks.

So, on a visit to Böblingen, I visited the said company and asked them whether it would be possible to negotiate a price.

Sure enough, from an old box, high up on one of their shelves they pulled out an old TAF Apron which looked a lot worse than my current one. Of course they could prepare this for me and on looking at the actual prices for a TAF Apron on the internet, concluded that I could actually have it for 70 €uro.

Well, this was still a bit excessive for me, so I declined.

Having returned home, I sent a follow-up email to Pinball Perfect, stating that as they had to prepare the apron, paint it, apply the decals and then clearcoat it, I would save them all that bother and expense and still give them 20 €uro for the original Apron.

Strangely, they declined my friendly offer, with the words: “unimaginable and therefore absolutely impossible!”

For a company that charges 48€ per hour for mechanical work, considering the amount of such work and the cost of decals plus paint that would be needed to repair the apron, it seems to me like this decision has not been made on a commercial basis, but rather based on G-R-E-E-D!

Dot Matrix Display controller board

Wednesday, February 18th, 2009
DMD Controller Board kit

DMD Controller Board kit

Received a DMD controller board today (in kit form) from my new friends at Flippermarkt.de. The idea of this kit is to not only regulate the overall brightness of the display (thereby extending its life) but also to allow easy fault detection (by simply switching on all pixels with the flip of a switch).

I’ll report on the results, as soon as I’ve built it up and connected it to the machine

My Pinball machine is haunted!!

Sunday, February 15th, 2009

I decided to remove the Thing Hand Box yesterday. I had already read (over months of research) that this was a difficult task, as there are three screws on the rear of the playfield which are securing the box. To get to these screws is near on impossible, as with the playfield in the fully upright position, it is difficult to get a tool underneath the playfield to take them off.

The solutions I have seen suggested, include pulling the playfield out of its mount and resting the front of the playfield on the front of the pinball body. Three reasons stopped me from doing this:

  1. The playfield is extremely heavy
  2. resting the playfield on the front of the body could potentially damage some of the wiring/mechanics on the underside of the playfield
  3. Even with the playfield moved forward by the recommended four inches would not expose the back of the playfield anyway

So I decided on the option of holding the playfield up at a 45 degree angle using the holding bar in the body (on the right side of the body). There is a round cut-out on the underside of the playfield that this bar fits into.

With the playfield in this position it was easier to get to the screws with a ratchet and 1/4 inch socket. It was hard but I managed to get two of the screws out but on removing the third screw, I managed to drop the socket inside the body. Lifting up the playfield into its vertical positon to search for the socket, I heard the socket fall down some more, but when I looked inside the box, the socket was no-where to be seen. It had vanished. I checked all the obvious places (loudspeaker magnet, transformer magnet etc); I checked all the corners inside the box (finding the other half of the broken blue target and the tip of a slingshot plastic in the process) but the socket was no-where to be seen! Even though there are no holes through which the socket could have fallen in the body of the pinball, I checked underneath the pinball machine, but with no luck.

My pinball machine is haunted with thieving ghosts! (This isn’t the first item that’s simply disappeared, incidentally: the first was a plastic spacer from the dot-matrix display).

A small tip at this point, I wouldn’t recommend searching inside the pinball box: everything is covered in the so-called “pinball dust” which gets everywhere. I had to wash five times in the search process and change my t-shirt twice, making the whole searching escapade that more frustrating.

But then came the icing on the cake: I discovered you don’t even need to take out these three screws at the back of the playfield to remove the Thing Hand box. At the most, you only need to loosen them slightly, as they secure a bracket which holds the Thing Hand box at the bottom (there are, in fact, just two screws securing the Hand box to the playfield). So this would have been a much easier (and quicker) task had I known this – and less frustrating!

I still haven’t found the socket as of today, and believe me, I’ve been looking!

The arch (aka apron)

Friday, January 30th, 2009

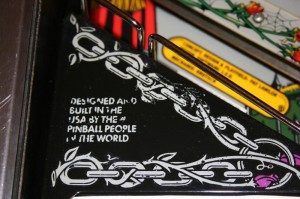
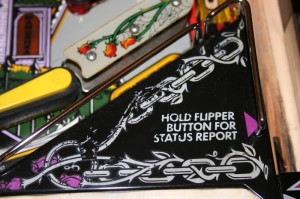
Remember my arch (aka apron)? The part that’s been cleaned so much that the graphic on it has been badly worn away? As a reminder, here are the photos:

Badly worn decal on left side of arch

Badly worn decal on left side of arch

Badly worn decal on right side of arch

Badly worn decal on right side of arch

Well, my original intention was to cover these up with new decals.

However, having ordered and received the new decals, I decided I didn’t want to use them because they would obviously look like decals if I applied them to the apron (as they are relatively thick compared to the current decals, which are silk screened onto the apron). So I’ve now decided to look for an alternative solution.

Having looked for an alternative way of transfering the image onto the arch, it became obvious to me, that potentially it was going to be difficult to reproduce the decals to a quality which I would find acceptable. I therefore decided that I would be better off to leave my current arch well alone and buy a second one to work on (preferably old).

So, off to eBay and then to the internet to find a second-hand TAF arch. But could I find one? No. Although I didn’t want to buy a new one, I even checked the on-line pinball shops, but even they didn’t have any.

But then I discovered something interesting. The part number for the TAF arch is A-13204-20017; the part number for a Jackbot arch is A-13204-50051; the part number for a Johny Menomic arch is A-13204-50042. I could see a pattern here. The A-13204 part of the part number was the same every time. Could it be that A-13204 denotes the metal part and the second part of the part number (ie 20017) denotes the machine (ie colour and decals)? After all, the aprons all seemed to look pretty similar, and it definitely would make business sense (for Bally/Williams) if they had always used the same base part for the arch. Even whilst looking through the shops, I found a “generic” Williams/Bally arch. Maybe my theory was correct?

A little research on eBay yielded the following:

A-13204-20017 = TAF Arch
A-13204-50051 = Jackbot Arch
A-13204-50042 = Johny Menomic Arch
A-13204-50005 = Fish Tales Arch
A-13204-50012 = Hurricane Arch
A-13204-50018 = Whitewater Arch
A-13204-50047 = Tales of the Arabian Nights Arch
A-13204-50004 = Getaway High Speed II Arch
A-13204-20001 = Harley Davidson Arch
A-13204-20018 = Creature from the Black Lagoon Arch
A-13204-50048 = Scared Stiff Arch
A-13204-50020 = Twilight Zone Arch
A-13204-50017 = Indiana Jones Arch
A-13204-20004 = Party Zone Arch
A-13204-50036 = Corvette Arch
A-13204-50039 = Theatre of Magic Arch

Could these all really be the same part? Or could there be a difference, for example, between the A-13204-5XXXX parts and the A-13204-2XXXX parts?

So it was off to my favourite forum (www.flippermarkt.de) to see if anyone there could help me. Well, after three days I’d had no reply to my question, so decided to take the plunge and try to buy one of the other arches second-hand.

A quick posting on the rec.games.pinball newsgroup got an almost instantaneous answer and I was offered a Hurricane arch for 15 dollars. So I bought it.

Now this arch is going to take at least a few weeks to get to me – enough time to research and work on my decal/transfer idea/technique……

Market Price for Pinball machines

Thursday, January 22nd, 2009

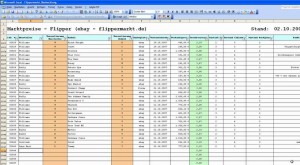
I came across an excellent web-site yesterday. This site ran by Sasha Werner in Germany includes a table in Excel format with pinball prices, as sold on either eBay or in a forum.

Market prices of pinball machines

Market prices of pinball machines

The spreadsheet, which Sasha has been running since June 2006, has currently 6281 unique entries and  includes all types of pinball machines, with prices and the condition of the machine (based on the product description and photos).

Yes, my pinball machine is also in the list and yes, I wish I had seen this list before making my bid….

The actual Excel spreadsheet can be accessed via this web page, and if, for whatever reason, this link is not working, I have my own copy (from today’s date) here.

Enjoy!

More manuals….

Tuesday, January 20th, 2009

Went crazy and bought a full set of manuals for my TAF today on eBay. Once again I didn’t really need them, but it’s somehow good to know I’ve now got a complete set…

Full set of TAF manuals

Full set of TAF manuals