Archive for the ‘TAF’ Category

Touching up The Power insert

Friday, November 27th, 2009

It was back to The Power insert today. I wanted to redo the yellow and orange “ring” as my previous efforts were much too “lumpy”, so instead of painting the yellow on with a brush I decided to spray the paint on (having removed my previous efforts with isopropyl alcohol). This required me to mask off the areas which shouldn’t be painted. For this I used a paint on masking, which goes on pink and dries clear. I painted the power insert and the orange cloud above the insert to allow me to then spray the paint over a larger area and to hopefully blend it in better with the playfield.

Masked off area around The Power insert

I used a “cheap” airbrush (with compressed air in a can) to spray the yellow paint (thinned with isopropyl alcohol) which finished off pretty thick:

Spray painted - maybe a little too much?

Having waited for the paint to dry, I removed the masking and found that indeed the paint was a little thick, so I gingerly sanded it down to blend it in with the playfield ans insert:

The end result after sanding

Although the colour difference is obvious in the photo, it doesn’t look too bad in real life – not bad for my first spray job on the playfield! Next, the orange frame around the insert….

New playfield!

Wednesday, November 25th, 2009

I’d been waiting so long for a “first” playfield from IPB, that I gave up in the end and accepted a “good” second, which I received today:

IPB Playfield "second"

 At first, everything seemed just as it should, but on closer inspection, I found the following damage:

I contacted IPB about these faults and they agreed to take the playfield back or give me a small discount. I opted for the discount, as I will have to have the playfield clear-coated again to even up the playfield – especially over the Mansion inserts – and intend to use this opportunity to touch up the playfield.

Update

Monday, November 16th, 2009

Well it’s not that I haven’t been working on my pinball machine – I’m just working on alternatives ways to progress at the moment and so have nothing to report. But just for completeness, here’s what I’ve been up to:

I’ve been improving my touch-ups to the playfield and will be presenting them here once I’ve completed the painting.

I acquired some acrylic “fluorescent” additive to try to get the orange touch ups around the POWER insert to be more fluorescent – with mixed results.

I cleaned the playfield with silicon remover to get rid of the grease marks (in preparation for the clear coating) which removed all of my black and orange touch ups from the playfield.

I found an interesting touch up alternative, which may be a good solution for the black and orange insert touch-ups. I’m waiting for this to be delivered. I will report on the success (or otherwise) of this solution once I’ve tried it out.

I’ve also sealed in my touch ups around the mansion inserts with thin superglue, applying it with a syringe. Although this worked fine, some of the purple and yellow colours bled into the surrounding black area. This needs to be reworked.

I’ve taken several metal parts to a metal worker to be reground (ie to remove the ball wear channels). I got these back and they looked wonderful (although the rivets for the connecting posts have also been slightly ground down, exposing a yellow finish under the chrome plating).

Reground metal parts showing the rivets with chrome plating removed

Reground metal parts showing the rivets with chrome plating removed

So next on my agenda are the following:

  1. Finish the touch ups to the playfield
  2. Apply the “cloud” decal
  3. Spot clear coat the playfield (over touch ups and decal)
  4. Rebuild the playfield

Plotter Cutter

Thursday, November 12th, 2009

I’ve read a lot of late on the forums of people touching up their playfields with an airbrush and paper masks cut from masking paper. It seems a relatively straight forward process and so did some more investigating.

In so doing I stumbled accross a Craft-Robo CC330-20 cutter plotter which would appear to do everything that would be required for playfield touch-ups and at a reasonable price. So I bought one.

The CraftRobo CC330-20 plotter cutter

This looks like it may do the trick for several of my touch-ups.

Things metal box

Thursday, October 15th, 2009

Picked up the metal box from the zinc plating works today. They certainly had tried to get it clean. The inside was virtually flawless (only a few spots) but the outside was still as it had been:

Inside Things metal box - almost flawless

Inside Things metal box - almost flawless

Outside of Things metal box - still some work needed here.

Outside of Things metal box - still some work needed here.

I’ve decided to keep this box instead of getting a new one (which had been my plan following the intial disaster). So I’ll have to carefully sand down the outside of the box to remove the spots before installing it into the pinball machine.

Touching up the touch ups

Thursday, October 8th, 2009

Having decided upon which protector to use for the electric chair (see last post) I inserted it into the playfield from the backside and was horrified to see the metal frame poking out from behind my front bevel. I had cut the bevel too deep! As I didn’t want to live with this (it was ugly), I decided to fill in the bevel with wood putty and rework it to the right level, so that it fitted with my new protector. I also discovered online that the original playfields also had bevels on the sides (which explains the shape of the artwork to the left of the hole. So I thought I would take this opportunity to bevel the hole as originally intended:

Electric Chair hole showing original bevel

Electric Chair hole showing original bevel

I also thought I’d take the opportunity to rework some of my earlier touch ups (note the use of masking tape to prevent damaging the playfield at the sanding phase):

Chair hole touch up

Chair hole touch up

Chair hole from behind - (note the height of the protector in the hole)

Chair hole from behind - (note the height of the protector in the hole)

Rebuild of Swamp entrance from shooter lane

Rebuild of Swamp entrance from shooter lane

Some Wood splintered on the right inlane switch hole which needed rebuilding

Some wood splintered on the right inlane switch hole which needed rebuilding

Protecting the outhole under the electric chair

Thursday, October 8th, 2009

The hole under the electric chair gets a lot of use and abuse during normal play and is always the first hole to show wear and tear. With time this wear becomes extremely ugly. And with it (almost) being in the centre of the playfield, it’s not exactly something you can miss whilst playing:

Typically damaged outhole under Uncle Fester's chair

Typically damaged outhole under Uncle Fester's chair

There are two alternative to protect this highly vulnerable area: firstly, a so called “Cliffy Protector”:

A Cliffy protector for the Electric Chair hole

A Cliffy protector for the Electric Chair hole

which clips onto the hole and is held in place by the screws for the chair bracket:

A Cliffy Protector mounted onto the playfield

A Cliffy Protector mounted onto the playfield

It certainly looks good! Of course the advantage of this is that it covers up the damaged hole as well as protecting it from further damage. The disadvantage is, well, that it isn’t original.

The second alternative protector looks like this:

Hole Guard protector

Hole Guard protector

This part mounts from the underside of the playfield and protects the playfield when the balls are kicked out of the hole. This part can’t be seen when inserted into the machine and just does its job, leaving the playfield looking more authentic.

I chose to go with the second option (not only to have the playfield as authentic as possible, but also to show off my touch up!)  on the understanding that if the conditon of the hole degraded in any way in the future, then I could always install a Cliffy protector afterwards.

Thing’s Metal Box

Wednesday, October 7th, 2009

In my endeavours to get everything clean, I used some abrahsive cleaner to clean Thing’s Metal Box (which resides under the playfield). Unfortunately the cleaner that I used (Stahlfix) was way too agressive for the zinc coating and so etched through to the metal underneath:

Zinc plating etched away after cleaning

Zinc plating etched away after cleaning

More etching of the zinc coating

More etching of the zinc coating

Having made a few enquiries online as to what I could or should do, I decided to get the zinc coating renewed on the metal box. So I looked for a local works that could do this for me.

To cut as long story short, I went to pick it up today and was disgusted by the finish: the coating wasn’t uniform at all and there were like pieces of grit under the zinc coating making the finish extremely rough – both inside and out – just right for a pinball – NOT!

Needless to say I declined the part and asked them to rework it. I’ll see next week whether they’ve been able to correct the mistakes.

Incidentally – and this is a very important point, I had the metal box “hot-dip galvanised” when I should have had it galvanically galvanised (using electricity)  – this latter method results in a more uniform and better looking coating.

If I had only known that before (or the work shop had actually told me)!

IDC connectors

Monday, September 21st, 2009

The original pinball machine uses Insulation Displacement Connectors (IDC) for all of the connectors in the back box, which have a reputation for being unreliable – especially the ones handling the General Illumination (GI) circuits. The reason being, that these connections take a lot of current constantly and the high temperature in the backbox derates the current carrying ability of the connectors, so that the connectors (and pins) eventually burn and break.

When replacing these connectors it is therefore highly recommended to use Molex type connectors with crimp contacts to improve the reliability of the contact. However making a crimp contact requires skill and the use of a special crimping tool, both of which can be easily acquired, but for me the biggest sticking point was the need to put two wires into a single crimp contact, which, although can be done, brings more unreliability into the equation than usig a simple IDC connector.

So, even though I had already bought several Molex connectors and pins, I looked for a suitable IDC connector.

On RGP it was mentioned that ITW Pancon still makes such connectors. So, having looked on their web-site, I found a suitable source of connectors.

My intention was to firstly replace both GI connectors on the Power Board (one 11 pin and one 12 pin) and to replace the 6 pin connector to the optoboard for Thing’s motor (which had always given me problems). Interestingly, Pancon supplies connectors which operate reliably at high currents and high temperatures and so are ideal for the back-box application.

So the parts that I needed were:

  • CTH156F18-12C (high power; 18AWG; 12 pin)
  • CTH156F18-11C (high power; 18 AWG; 11 pin)
  • CT156F22-6C (22 AWG; 6-pin)

Unfortunatlely the 11 pin and 12 pin variants weren’t readily available (requiring a minimum order quantity of 2,000 parts) but I was able to source small quantities of the 5 pin and 6 pin High Power variants which would be adequate for what I had in mind.

Magnetic Burn touch up

Monday, September 21st, 2009

After a long time searching and waiting, I found and won a Magnet Burn decal on eBay:

Self adhesive magnet burn decal

Self adhesive magnet burn decal

It turns out it’s a genuine Bally original and came with mylar to protect the slingshots. A bargain.

As I’ve decided not to remove the mylar from my playfield, this would imply that to use this decal would require me to cut off the upper portion of the decal where the mylar starts in front of the two blue target (in front of the grave yard). This, combined with the fact that the colours on the decal didn’t match 100% to my playfield, I decided to scan in the image, colour match the colours and print it out on water slide paper to apply to the playfield.

As the decal has five colours to match, which, based on previous colour matching experiences (with the apron) would take for ever, I extracted the maximum area from this decal with the fewest colours for matching. As the magent burn is mostly visible in the white portion, I finished with the following extract, requiring just three colours to be matched (plus black):

Extract from the magnet burn decal with just 3 colours

Extract from the magnet burn decal with just 3 colours

In trying to match the three colours, I developed a new iterative technique which reduced the time in matching the colours considerably. Once I’ve made sure this technique works most of the time, I will publish the details here, of course.

Having matched the colours on my target decal paper I had to use another piece of decal paper to print out the final decal. Despite the fact that this second piece of decal paper came from the same supplier, the colours on the second sheet didn’t match the colours on the original sheet meaning I had both wasted time and a piece of very expensive water slide decal paper – ughhhhh!

Despite this set-back I thought I’d try out the decal anyway, so having sealed the decal with lacquer and letting it dry, I carefully cut out the decal with a sharp knife around the black “frame”. I then immersed it in water long enough for the decal to come away from the backing paper and then applied it to the playfield. In so doing I damaged the decal, so with this trial I learned a valuable lesson in how not to apply it when I come to applying the final version.

Playfield with Magnet Burn water-slide decal applied

Playfield with Magnet Burn water-slide decal applied

To be honest,  I don’t think it looked too bad. OK, so the colours may be slightly off (especially the grey) and the edges of the decal still need to be tidied up (and painted black, as the water slide decal paper is white) but this definitely shows the potential of this method.

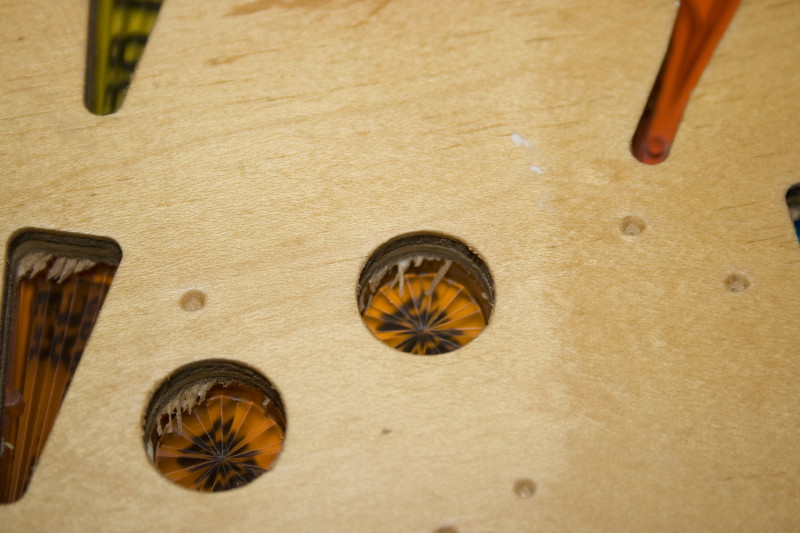
Having verified this methodology, I removed the decal again, leaving the magnet burn area visible again:

Playfield with magnet burn, for comparison

Playfield with magnet burn, for comparison